Showing posts with label Computer. Show all posts

2013/10/13

desktop-mirror 串流螢幕上的影像及聲音到其他電腦上


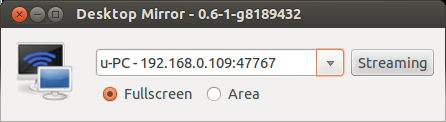
desktop-mirror 最近在玩的 project,這隻程式主要是讓使用者的電腦上的畫面及聲音可以即時傳送給其他同網域的電腦,相類似的應用如 AirPlay Mirroring and Miracast

所有程式可在 github 上找到。


目前 desktop-mirror 在以下環境下測試皆能順暢的分享螢幕上畫面及聲音 Windows 7, Ubuntu 12.04 and XBMC。以下是實際使用的影片:


技術細節 - 影音串流


螢幕畫面的串流是用 ffmpeg 及 crtmpserver。其中,ffmpeg 配合著影像輸入為 x11grab (Ubuntu) 或 dshow (Windows) 將影像編碼成 H.264 baseline profile,聲音則是輸入為 ALSA 編碼成 mp3,最後封裝成 flv ,透過 TCP 傳出去。在接收端為非 XBMC 的情形下,ffmpeg 會將輸出結果送至 crtmpserver,接著 crtmpserver 為改成用 rtmp protocol 等待接收端來要求影音。

在這整個流程中有很多其他選擇,但考慮到跨平台及不同的接收端,最後才採用這樣的(奇怪)組合。

技術細節 - Windows/Ubuntu 平台移植


這隻程式使用的語言及 GUI library 是 wxPython,因此在各個平台之間的移植沒遇到什麼大問題。當然,前提是在選擇 library 及 external program 要十分注意,像是 mDNS (Avahi/Bonjour) 在 python 上介面是不是跨平台等。

唯一踩到的地雷是在 python 處理 process 輸出時用到的 select/epoll,這類的 function 在 Windows 上只支援 socket descriptor,因此重新用 Queue 及 thread 重新做了一個類似功能的東西。

最後打包成安裝檔的部分。在 Windows 就準備 py2exe,一堆的動態鏈結的程式庫和執行檔,及 NSIS 的包裝檔。Ubuntu 的部分則就準備 debianize 的資料匣,再準備個 recipe 讓它定期自行去 github import 程式,再自動編成 package 放到 PPA。

最後


這個 project 自認為很好玩,也還有一些遠端遙控的部分功能可以加強,只是我又想到別的好玩東西了,這個案子就做到這裡就好。

後記:參加了 QNAP 舉辦的 APP 競賽得到了第一名節殊榮


2013/04/23

Install Ubuntu Core on NAS


好久之前入手了一台華芸科技 ASUSTOR AS-604T 的 NAS,對於某些玩家來說(像我),不能方便的用 apt 安裝自己想要的軟體實在是很麻煩,還好的是用 Ubuntu Core 來在上面製作一個簡單的 Ubuntu rootfs 是非常容易的。本文最後將在 Ubuntu Core 上安裝另一個 SSH server 做為介紹。

考量到為了以後方便移植軟體進去 NAS,推薦使用跟 AS-604T 相容的 Ubuntu 版本 (11.10) 未來才不會遇到太多函式庫相依的問題。

接著本文將展示
  • 使用 Ubuntu Core
  • Hacking ASUSTOR NAS

安裝 Ubuntu Core

$ ssh root@192.168.0.50 # ssh to your NAS
$ # Download Ubuntu Core 11.10
$ cd /volume1/ 
$ wget http://cdimage.ubuntu.com/ubuntu-core/releases/11.10/release/ubuntu-core-11.10-core-amd64.tar.gz
$ # Extract it to ubuntu
$ mkdir ubuntu && tar xvf ubuntu-core-11.10-core-amd64.tar.gz -C ubuntu/

mount.sh

$ cat << END > mount.sh
#!/bin/sh
ubuntu=/volume1/ubuntu
if [ "\$1" == "umount" ]; then
    if grep -q " \$ubuntu/" /proc/mounts; then
        awk -v ubuntu=$ubuntu '$2 ~ /ubuntu\// { print \$2 }' /proc/mounts | sort -u | xargs umount
    else
     true
    fi
elif [ "\$1" == "mount" ]; then
    grep -q " \$ubuntu/proc " /proc/mounts || mount -o bind /proc \$ubuntu/proc
    grep -q " \$ubuntu/sys " /proc/mounts || mount -o bind /sys \$ubuntu/sys
    grep -q " \$ubuntu/mnt" /proc/mounts || mount -o bind /volume1 \$ubuntu/mnt
    grep -q " \$ubuntu/dev/pts" /proc/mounts || mount -t devpts /dev/pts \$ubuntu/dev/pts
else
    awk -v ubuntu=\$ubuntu '\$2 ~ /ubuntu\// { print \$2 }' /proc/mounts | sort -u
fi
END
$ chmod +x mount.sh

chroot.sh

$ cat << END > chroot.sh
#!/bin/sh
if [ \$# == "0" ] ; then
    chroot /volume1/ubuntu /bin/bash
else
    chroot /volume1/ubuntu \$*
fi
END
$ chmod +x chroot.sh

安裝基本工具 and 切換到 Ubuntu

$ echo nameserver 8.8.8.8 >> /etc/resolv.conf
$ cat << END >> /etc/apt/source.list
deb http://tw.archive.ubuntu.com/ubuntu/ precise universe
deb-src http://tw.archive.ubuntu.com/ubuntu/ precise universe
deb http://tw.archive.ubuntu.com/ubuntu/ precise-updates universe
deb-src http://tw.archive.ubuntu.com/ubuntu/ precise-updates universe
END
$ ./mount.sh mount # 掛載 filesystems,每次開機只要做一次
$ ./chroot.sh #切換到 Ubuntu
$ apt-get update
$ apt-get install command-not-found less vim x11-apps
至此我們已經有一個 Ubuntu 可以使用了。

安裝另一個 OpenSSH server

$ apt-get install openssh-server
$ passwd root
$ sed -i 's/^Port 22$/Port 2222/' /etc/ssh/sshd_config
$ /etc/init.d/ssh start
從別台電腦登入新開的 ssh server,順便啟用 X11 Forwarding
$ xhost +
$ ssh -X root@192.168.0.50 -p 2222
$ # 設 local ip:display number
$ export DISPLAY=192.168.0.100:0
$ xclock
結果如同第一張圖所示,我們新開了一個 ssh service 在 2222 埠,連進去後 X11 Forwarding 也能順利使用(原先 ASUSTOR NAS 的 ssh server 不提供 X11 forwarding)。

順便提供自動設 DISPLAY 參數的 script,可以加在 ~/.bashrc,以後就不用每次 export DISPLAY=...
# DISPLAY
remote_ip=`env | awk '$0 ~ /^SSH_CLIENT=/ {print substr($1, index($1, "=") + 1)}'`
if [ ! -z "$remote_ip" ] ; then
    export DISPLAY=$remote_ip:0
    echo DISPLAY=$DISPLAY
fi

ASUSTOR NAS 程式自動啟動


可以在 /usr/local/AppCentral/*/CONTROL/start-stop.sh 找到一些 ASUSTOR NAS 的啟動 script。我隨便挑了一個 python 的 start-stop.sh 來偷加入剛才的 ssh server 啟動結束指令,如下列第 11 及 17 行

1 #!/bin/sh
     2
     3 EASY_INSTALL_BIN=/usr/local/AppCentral/python/bin/easy_install
     4 EASY_INSTALL_LINK=/usr/local/bin/easy_install
     5
     6 case $1 in
     7
     8  start)
     9   echo "Starting python..."
    10   ln -sf $EASY_INSTALL_BIN $EASY_INSTALL_LINK
    11   /volume1/mount.sh mount && /volume1/chroot.sh /etc/init.d/ssh start
    12   ;;
    13
    14  stop)
    15   echo "Stopping python..."
    16   rm -rf $EASY_INSTALL_LINK
    17   /volume1/chroot.sh /etc/init.d/ssh stop && /volume1/mount.sh umount
    18   ;;
    19
    20  *)
    21   echo "usage: $0 {start|stop}"
    22   exit 1
    23   ;;
    24
    25 esac
    26 exit 0

(為什麼 NAS 系統不直接以 Ubuntu/Debian/... 當做 base system 就好)

2013/04/18

gksudo & pkexec (PolicyKit)


gksudo 和 pkexec 是二種有圖形化介面取得 root 權限執行程式的方式。gksudo 是 sudo 的 GTK+ frontent,也因此它與 sudo 是用相同的權限管理設定。

pkexec 是基於 PolicyKit,比起 sudo(gksudo),它提供更彈性權限管理與介面客製化的設定。在 Ubuntu 12.04 上可以在以下地方找到它的設定檔:
  • Actions: /usr/share/polkit-1
  • Local Authorities: /etc/polkit-1
  • 3rd party Authorities: /var/lib/polkit-1
Actions 是設定行為,舉例來說 gparted 的執行權限如下:
$ cat /usr/share/polkit-1/actions/com.ubuntu.pkexec.gparted.policy
<?xml version="1.0" encoding="UTF-8"?>
<!DOCTYPE policyconfig PUBLIC
 "-//freedesktop//DTD PolicyKit Policy Configuration 1.0//EN"
 "http://www.freedesktop.org/standards/PolicyKit/1/policyconfig.dtd">
<policyconfig>

  <action id="com.ubuntu.pkexec.gparted">
    <message gettext-domain="gparted">Authentication is required to run the GParted Partition Editor</message>
    <icon_name>gparted</icon_name>
    <defaults>
      <allow_any>auth_admin</allow_any>
      <allow_inactive>auth_admin</allow_inactive>
      <allow_active>auth_admin</allow_active>
    </defaults>
    <annotate key="org.freedesktop.policykit.exec.path">/usr/sbin/gparted</annotate>
    <annotate key="org.freedesktop.policykit.exec.allow_gui">true</annotate>
  </action>

</policyconfig>

allow_* 則可根據不同的使用情境設定授權方式,像 auth_admin 就是要求授權對象(user)需有管理權限才能執行,換句話說就是要輸入密碼。詳細不同點可參考下方引用
allow_any, allow_inactive, and allow_active. Inactive sessions are generally remote sessions (SSH, VNC, etc.) whereas active sessions are logged directly into the machine on a TTY or an X display. Allow_any is the setting encompassing both scenarios.
For each of these settings the following options are available:
  • no: The user is not authorized to carry out the action. There is therefore no need for authentification.
  • yes: The user is authorized to carry out the action without any authentification.
  • auth_self: Authentication is required but the user need not be an administrative user.
  • auth_admin: Authentication as an administrative user is require.
  • auth_self_keep: The same as auth_self but, like sudo, the authorization lasts a few minutes.
  • auth_admin_keep: The same as auth_admin but, like sudo, the authorization lasts a few minutes.
 annotate key 的那 2 行則是設定程式路徑及是否允許 GUI。

什麼叫做管理權限呢?在 /etc/polkit-1/localauthority.conf.d/51-ubuntu-admin.conf 設定了若該位使用者為 sudo 或 admin group 便能算是有管理權限
$ cat /etc/polkit-1/localauthority.conf.d/51-ubuntu-admin.conf
[Configuration]
AdminIdentities=unix-group:sudo;unix-group:admin
當然你也可以根據不同 action 設定不同的管理權限及反應。像是在 /var/lib/polkit-1/localauthority/10-vendor.d/com.ubuntu.desktop.pkla 裡有一段
[Disable hibernate by default]
Identity=unix-user:*
Action=org.freedesktop.upower.hibernate
ResultActive=no
裡頭設定了所有使用者(unix-user:*)都不行(ResultActive)用 org.freedesktop.upower.hibernate。

參考資料

2011/09/04

Custom gesture support on Ubuntu

恰巧在IBM developer看到了一篇Ubuntu上gesture的教學,但因為那篇是perl及年久失修(?),所以我稍微在Ubuntu 11.04及用python重寫了這個應用。

這篇文章將會給介紹Ubuntu上怎麼來寫筆電的touchpad gesture應用,主要用python、synclient和xdotool。synclient是用來抓touchpad被按下的座標值及指數。xdotool則用來送出相對應的鍵盤行為。

synclient

首先,在Ubuntu 11.04上,若要啟用synclient必需先修改xorg.conf,加入Option "SHMConfig" "on",如下

//file: /usr/share/X11/xorg.conf.d/50-synaptics.conf
Section "InputClass"
        Identifier "touchpad catchall"
        Driver "synaptics"
        MatchIsTouchpad "on"
        MatchDevicePath "/dev/input/event*"
        Option "SHMConfig" "on"
EndSection

接著可在terminal上使用synclient,來看一下他的輸出:

doro@doro-UL80Jt ~/src/touchpad $ synclient -m 10
    time     x    y   z f  w  l r u d m     multi  gl gm gr gdx gdy
   0.000   418  413   0 0  0  0 0 0 0 0  00000000
   0.617   363  359  31 1  0  0 0 0 0 0  00000000
   0.627   362  356  31 1  0  0 0 0 0 0  00000000
   0.637   363  352  31 1  0  0 0 0 0 0  00000000
   0.657   364  349  31 1  0  0 0 0 0 0  00000000
   0.677   368  347  31 1  0  0 0 0 0 0  00000000
   0.688   371  344  31 1  0  0 0 0 0 0  00000000
   0.708   373  340  31 1  0  0 0 0 0 0  00000000
   0.728   375  336  31 1  0  0 0 0 0 0  00000000
   0.738   376  333  31 1  0  0 0 0 0 0  00000000
   0.849   376  333   0 0  0  0 0 0 0 0  00000000
   1.688   232  672  31 2  0  0 0 0 0 0  00000000
   1.718   274  679  31 3  0  0 0 0 0 0  00000000
   1.799   274  679   0 0  0  0 0 0 0 0  00000000

這個指令會輸出目前touchpad被按下的點(x,y)以及f欄位標示出指數。因此我們便可利用這3個值來判斷手勢。最後再利用xdotool來執行我們要做的行為。

Example

底下這個例子,將會實作
  • 若3指按下時,送出super+w,進入expo mode 
  • 若3指按下後移動上/下/左/右超過100個單位,送出ctrl+alt+Up/Down/Left/Right,來做work space的切換 

#!/usr/bin/python
# -*- coding: utf-8 -*-

import logging
logging.basicConfig(filename='/tmp/multitouch.log',
        level=logging.DEBUG, 
        format='[%(asctime)s][%(name)s][%(levelname)s] %(message)s')
logger = logging.getLogger('multitouch')

import subprocess
import re

if __name__ == "__main__":
    cmd = 'synclient -m 10'

    p = subprocess.Popen(cmd, stdout = subprocess.PIPE, 
            stderr = subprocess.STDOUT, shell = True)
    skip = False
    try:
        while True:
            line = p.stdout.readline()
            if not line:
                break
            try:
                tokens = [x for x in re.split('([^0-9\.])+', line.strip()) if x.strip()]
                x, y, fingers = int(tokens[1]), int(tokens[2]), int(tokens[4])
                logger.debug('Result: ' + str(tokens))
                if fingers == 3:
                    if skip:
                        continue
                    skip = True
                    start_x, start_y = x, y
                else:
                    if skip:
                        diff_x, diff_y = (x - start_x), (y - start_y)
                        if diff_x > 100:
                            logger.info('send...diff_x > 100')
                            subprocess.Popen("xdotool key ctrl+alt+Right", shell=True)
                        elif diff_x < -100:
                            logger.info('send...diff_x < -100')
                            subprocess.Popen("xdotool key ctrl+alt+Left", shell=True)
                        elif diff_y > 100:
                            logger.info('send...diff_y > 100')
                            subprocess.Popen("xdotool key ctrl+alt+Down", shell=True)
                        elif diff_y < -100:
                            logger.info('send...diff_y < -100')
                            subprocess.Popen("xdotool key ctrl+alt+Up", shell=True)
                        else:
                            logger.info('send...super+w')
                            subprocess.Popen("xdotool key super+w", shell=True)
                    skip = False
            except (IndexError, ValueError):
                pass
    except KeyboardInterrupt:
        pass 
(keyboard is better, but just for fun :D)

2011/08/19

Linux Kernel Initcall

Linux kernel module的module init function 如下,本文將以kernel module為例,說明他們是怎麼被kernel核心呼叫到。
static int __devinit tegra_kbc_init(void) {	
    pr_debug("KBC: tegra_kbc_init\n")
	return platform_driver_register(&tegra_kbc_driver)
}
module_init(tegra_kbc_init)

module_init

隨便找到有呼叫module_init的kernel module往上追,可以找到最後是呼叫到__define_inicall(level,fn,id)這個macro,如下
// File: include/linux/init.h
#define module_init(x)	__initcall(x)
#define __initcall(fn) device_initcall(fn)
#define device_initcall(fn)		__define_initcall("6",fn,6)
#define __define_initcall(level,fn,id) \
    static initcall_t __initcall_##fn##id __used \
    __attribute__((__section__(".initcall" level ".init"))) = fn
其中以module_init(tegra_kbc_init)會被展開成
static initcall_t __initcall_tegra_kbc_init6 __used 
__attribute__((__section__(".initcall6.init"))) = tegra_kbc_init 
由__attribute__得知,它最後會被放到initcall6.init這個section裡。而linker連結時會根據vmlinux.lds.S來將它放到指定的section。如下的INIT_CALLS。
// File: arch/arm/kernel/vmlinux.lds.S
SECTIONS {		
    INIT_SETUP(16)
    INIT_CALLS
    CON_INITCALL
    SECURITY_INITCALL
    INIT_RAM_FS
再往下追就看到了.initcall6.init。
// File: include/asm-generic/vmlinux.lds.h
#define INIT_CALLS							\
		VMLINUX_SYMBOL(__initcall_start) = .;			\
		INITCALLS						\
		VMLINUX_SYMBOL(__initcall_end) = .;

#define INITCALLS							\
	*(.initcallearly.init)						\
	VMLINUX_SYMBOL(__early_initcall_end) = .;			\
  	*(.initcall0.init)						\
  	*(.initcall0s.init)						\
  	*(.initcall1.init)						\
  	*(.initcall1s.init)						\
  	*(.initcall2.init)						\
  	*(.initcall2s.init)						\
  	*(.initcall3.init)						\
  	*(.initcall3s.init)						\
  	*(.initcall4.init)						\
  	*(.initcall4s.init)						\
  	*(.initcall5.init)						\
  	*(.initcall5s.init)						\
	*(.initcallrootfs.init)						\
  	*(.initcall6.init)						\
  	*(.initcall6s.init)						\
  	*(.initcall7.init)						\
  	*(.initcall7s.init)

do_initcalls

kernel是從那裡呼叫到init calls,可以從kernel的entry point,init/main.c,找到下面這個函式。
// File: init/main.c
extern initcall_t __initcall_start[], __initcall_end[], __early_initcall_end[];
static void __init do_initcalls(void) {	
    initcall_t *fn;
	for (fn = __early_initcall_end; fn < __initcall_end; fn++)
        do_one_initcall(*fn);
	/* Make sure there is no pending stuff from the initcall sequence */	
    flush_scheduled_work();
}
一路往上追可以知道do_initcalls()在start_kernel()的最後的函式裡面用一個kernel thread間接呼叫,這裡很容易就可以追到了,我就不再列出。

2011/08/17

Android上的LAN device

最近要在Android上加LAN device support,該LAN device 是USB interface的SMSC9514。

ifconfig


adb shell後用以下指令可以看到目前板子上的網路裝置
# busybox-armv6l ifconfig -a

busybox可自行上網下載執行檔

ifconfig 運作方式


追busybox的code可以找到這段程式

// file: busybox-1.18.4/networking/interface.c
#define _PATH_PROCNET_DEV               "/proc/net/dev"

static int if_readlist_proc(char *target)
{
	static smallint proc_read;

	FILE *fh;
	char buf[512];
	struct interface *ife;
	int err, procnetdev_vsn;

	if (proc_read)
		return 0;
	if (!target)
		proc_read = 1;

	fh = fopen_or_warn(_PATH_PROCNET_DEV, "r");
	if (!fh) {
		return if_readconf();
	}

可以看到它open了一個檔案_PATH_PROCNET_DEV,這個檔案為"/proc/net/dev",所以得知ifconfig是從那裡抓network devices name

driver


秀出/proc/net/dev訊息


至於driver如何將這些資訊秀出可以參考 dev_seq_show() 如下

// file: kernel/net/core/dev.c
static void dev_seq_printf_stats(struct seq_file *seq, struct net_device *dev)
{
	struct rtnl_link_stats64 temp;
	const struct rtnl_link_stats64 *stats = dev_get_stats(dev, &temp);

	seq_printf(seq, "%6s: %7llu %7llu %4llu %4llu %4llu %5llu %10llu %9llu "
		   "%8llu %7llu %4llu %4llu %4llu %5llu %7llu %10llu\n",
		   dev->name, stats->rx_bytes, stats->rx_packets,
		   stats->rx_errors,
		   stats->rx_dropped + stats->rx_missed_errors,
		   stats->rx_fifo_errors,
		   stats->rx_length_errors + stats->rx_over_errors +
		    stats->rx_crc_errors + stats->rx_frame_errors,
		   stats->rx_compressed, stats->multicast,
		   stats->tx_bytes, stats->tx_packets,
		   stats->tx_errors, stats->tx_dropped,
		   stats->tx_fifo_errors, stats->collisions,
		   stats->tx_carrier_errors +
		    stats->tx_aborted_errors +
		    stats->tx_window_errors +
		    stats->tx_heartbeat_errors,
		   stats->tx_compressed);
}

/*
 *	Called from the PROCfs module. This now uses the new arbitrary sized
 *	/proc/net interface to create /proc/net/dev
 */
static int dev_seq_show(struct seq_file *seq, void *v)
{
	if (v == SEQ_START_TOKEN)
		seq_puts(seq, "Inter-|   Receive                            "
			      "                    |  Transmit\n"
			      " face |bytes    packets errs drop fifo frame "
			      "compressed multicast|bytes    packets errs "
			      "drop fifo colls carrier compressed\n");
	else
		dev_seq_printf_stats(seq, v);
	return 0;
}

driver註冊network device


driver要跟kernel註冊自己是個network device,註冊時最底層是用到 list_netdevice

// file: kernel/net/core/dev.c
/* Device list insertion */
static int list_netdevice(struct net_device *dev)
{
	struct net *net = dev_net(dev);

	ASSERT_RTNL();

	write_lock_bh(&dev_base_lock);
	list_add_tail_rcu(&dev->dev_list, &net->dev_base_head);
	hlist_add_head_rcu(&dev->name_hlist, dev_name_hash(net, dev->name));
	hlist_add_head_rcu(&dev->index_hlist,
			   dev_index_hash(net, dev->ifindex));
	write_unlock_bh(&dev_base_lock);
	return 0;
}

最外層是用

// file: kernel/drivers/net/usb/usbnet.c
int
usbnet_probe (struct usb_interface *udev, const struct usb_device_id *prod)
{
	status = register_netdev (net);

usbnet_probe又是誰呼叫了,我們就是我們要用的LAN chip SMSC95XX用到了

// file: kernel/drivers/net/usb/smsc95xx.c
static struct usb_driver smsc95xx_driver = {
	.name		= "smsc95xx",
	.id_table	= products,
	.probe		= usbnet_probe,
	.suspend	= usbnet_suspend,
	.resume		= usbnet_resume,
	.disconnect	= usbnet_disconnect,
};

SMSC9514

# $ adb shell
# lsusb
1d6b:0002 (bus 1, device 1)
1d6b:0002 (bus 2, device 1)
# # 插入裝置
# lsusb
1d6b:0002 (bus 1, device 1)
1d6b:0002 (bus 2, device 1)
0424:9514 (bus 1, device 2)
0424:ec00 (bus 1, device 3)
# busybox-armv6l ash
/ # # 設IP跟DNS
/ # busybox-armv6l ifconfig eth0 192.168.1.123
/ # busybox-armv6l route add default gw 192.168.1.1
/ # ping 168.95.1.1
PING 168.95.1.1 (168.95.1.1) 56(84) bytes of data.
64 bytes from 168.95.1.1: icmp_seq=1 ttl=242 time=670 ms
64 bytes from 168.95.1.1: icmp_seq=2 ttl=242 time=989 ms
64 bytes from 168.95.1.1: icmp_seq=3 ttl=242 time=589 ms
#setprop net.dns1 168.95.1.1

UI


這部分比較麻煩,可以自行參考android-x86的實作。

2011/08/15

Android WIFI Service

需控制Wifi的App會透過system service來呼叫到wifi service,像是在packages/apps/Settings裡的wifi設定頁面,它們會用類似這樣的語法來取得wifi system service。

mWifiManager = (WifiManager) context.getSystemService(Context.WIFI_SERVICE);
本文將探討由wifi system service到hardware做動的部分。


WifiService 註冊


ServiceManager.addService() 為所有service註冊都要用到的函式。WifiService也是,程式如下。

private ConnectivityService(Context context) {
        for (int netType : mPriorityList) {
            switch (mNetAttributes[netType].mRadio) {
            case ConnectivityManager.TYPE_WIFI:
                if (DBG) log("Starting Wifi Service.");
                WifiStateTracker wst = new WifiStateTracker();
                WifiService wifiService = new WifiService(context);
                ServiceManager.addService(Context.WIFI_SERVICE, wifiService);
                wifiService.checkAndStartWifi();
                mNetTrackers[ConnectivityManager.TYPE_WIFI] = wst;
                wst.startMonitoring(context, mHandler);

                //TODO: as part of WWS refactor, create only when needed
                mWifiWatchdogService = new WifiWatchdogService(context);
                break;
ConnectivityService是在SystemServer建構函式用到,至於SystemServer如何被叫到,自行去找Zygote的介紹

try {
                Slog.i(TAG, "Connectivity Service");
                connectivity = ConnectivityService.getInstance(context);
                ServiceManager.addService(Context.CONNECTIVITY_SERVICE, connectivity);
            } catch (Throwable e) {
                Slog.e(TAG, "Failure starting Connectivity Service", e);
            }

Service


開關Wifi是透過setWifiEnabled(),其Service內的實作程式如下

public synchronized boolean setWifiEnabled(boolean enable) {
        enforceChangePermission();

        if (DBG) {
            Slog.e(TAG, "Invoking mWifiStateMachine.setWifiEnabled\n");
        }

        if (enable) {
            reportStartWorkSource();
        }
        mWifiStateMachine.setWifiEnabled(enable);
最重要的是它用了WifiStateMachine::setWifiEnabled(),它實作如下

public void setWifiEnabled(boolean enable) {
        mLastEnableUid.set(Binder.getCallingUid());
        if (enable) {
            /* Argument is the state that is entered prior to load */
            sendMessage(obtainMessage(CMD_LOAD_DRIVER, WIFI_STATE_ENABLING, 0));
            sendMessage(CMD_START_SUPPLICANT);
        } else {
            sendMessage(CMD_STOP_SUPPLICANT);
            /* Argument is the state that is entered upon success */
            sendMessage(obtainMessage(CMD_UNLOAD_DRIVER, WIFI_STATE_DISABLED, 0));
        }
    }
可以看到它用了很多sendMessage(),這部分用了樹狀的有限狀態機,sendMessage是拿來叫目前所處的State物件,根據sendMessage要求的狀態來呼叫processMessage()處理。WifiStateMachine的樹狀結構如下

addState(mDefaultState);
            addState(mInitialState, mDefaultState);
            addState(mDriverUnloadingState, mDefaultState);
            addState(mDriverUnloadedState, mDefaultState);
                addState(mDriverFailedState, mDriverUnloadedState);
            addState(mDriverLoadingState, mDefaultState);
            addState(mDriverLoadedState, mDefaultState);
            addState(mSupplicantStartingState, mDefaultState);
            addState(mSupplicantStartedState, mDefaultState);
                addState(mDriverStartingState, mSupplicantStartedState);
                addState(mDriverStartedState, mSupplicantStartedState);
                    addState(mScanModeState, mDriverStartedState);
                    addState(mConnectModeState, mDriverStartedState);
                        addState(mConnectingState, mConnectModeState);
                        addState(mConnectedState, mConnectModeState);
                        addState(mDisconnectingState, mConnectModeState);
                        addState(mDisconnectedState, mConnectModeState);
                        addState(mWaitForWpsCompletionState, mConnectModeState);
                addState(mDriverStoppingState, mSupplicantStartedState);
                addState(mDriverStoppedState, mSupplicantStartedState);
            addState(mSupplicantStoppingState, mDefaultState);
            addState(mSoftApStartedState, mDefaultState);

        setInitialState(mInitialState);
要先確定自己目前的狀態才能知道程式會用那個State物件的processMessage()/enter()來處理。以上面的setWifiEnabled(true)為例,它會要求DriverUnloadedState::processMessage()處理CMD_LOAD_DRIVER。

class DriverUnloadedState extends HierarchicalState {
        @Override
        public void enter() {
            if (DBG) Log.d(TAG, getName() + "\n");
            EventLog.writeEvent(EVENTLOG_WIFI_STATE_CHANGED, getName());
        }
        @Override
        public boolean processMessage(Message message) {
            if (DBG) Log.d(TAG, getName() + message.toString() + "\n");
            switch (message.what) {
                case CMD_LOAD_DRIVER:
                    transitionTo(mDriverLoadingState);
                    break;
                default:
                    return NOT_HANDLED;
            }
            EventLog.writeEvent(EVENTLOG_WIFI_EVENT_HANDLED, message.what);
            return HANDLED;
        }
    }
DriverUnloadedState又轉換狀態到DriverLoadingState,轉過去時會先做enter() method如下

class DriverLoadingState extends HierarchicalState {
        @Override
        public void enter() {
            if (DBG) Log.d(TAG, getName() + "\n");
            EventLog.writeEvent(EVENTLOG_WIFI_STATE_CHANGED, getName());

            final Message message = new Message();
            message.copyFrom(getCurrentMessage());
            /* TODO: add a timeout to fail when driver load is hung.
		        Similarly for driver unload.
             */
            new Thread(new Runnable() {
                public void run() {
                    mWakeLock.acquire();
                    //enabling state
                    switch(message.arg1) {
                        case WIFI_STATE_ENABLING:
                            setWifiState(WIFI_STATE_ENABLING);
                            break;
                        case WIFI_AP_STATE_ENABLING:
                            setWifiApState(WIFI_AP_STATE_ENABLING);
                            break;
                    }

                    if(WifiNative.loadDriver()) {
                        Log.d(TAG, "Driver load successful");
                        sendMessage(CMD_LOAD_DRIVER_SUCCESS);
在此method中呼叫了WifiNative.loadDriver(),它真正會呼叫到底層叫loading kernel module的動作。終於要進入JNI了。

public class WifiNative {

    static final int BLUETOOTH_COEXISTENCE_MODE_ENABLED = 0;
    static final int BLUETOOTH_COEXISTENCE_MODE_DISABLED = 1;
    static final int BLUETOOTH_COEXISTENCE_MODE_SENSE = 2;

    public native static String getErrorString(int errorCode);

    public native static boolean loadDriver();

JNI


以上面的loadDriver()會呼叫到

static jboolean android_net_wifi_loadDriver(JNIEnv* env, jobject clazz)
{
    return (jboolean)(::wifi_load_driver() == 0);
}
wifi_load_driver()則是HAL提供。

HAL


HAL該提供的函式可參考hardware/libhardware_legacy/include/hardware_legacy/wifi.h,wifi_load_driver()的實作如下,可以看到insmod的關鍵system call。

int wifi_load_driver()
{
    char driver_status[PROPERTY_VALUE_MAX];
    int count = 100; /* wait at most 20 seconds for completion */

    if (is_wifi_driver_loaded()) {
        return 0;
    }

    if (insmod(DRIVER_MODULE_PATH, DRIVER_MODULE_ARG) < 0)
        return -1;

    if (strcmp(FIRMWARE_LOADER,"") == 0) {

其它

除了loading kernel driver外,其它有關wifi操作的部分皆是透過wpa_supplicant這套library,這套library很大,所以我不介紹了,有興趣的人可以參考external/wpa_supplicant。

2011/07/25

Synology DSM 3.2 Beta 之夜


上週應以前大學同學之邀再加上抽獎獎項的誘惑,參加了Synology Beta之夜。其間為了抽獎非常認真做了筆記(沒抽到我,完全用不到^^||),今天整理了一下筆記,順道介紹一下當天聽到了什麼新功能。

圖:真是人山人海

先說明一下我大概是半年前買了他們家的DS211j,目的是1)拿來抓迷之片,2)當網芳使用,3)備份我重要的文件。使用到現在以現有功能我是很滿意,但是我還是覺得缺了一些功能,像是dropbox的功能,本來還期待這次發表會會發表,都只能怪主持人一直喊private cloud,讓我抱了一絲絲的期待。

dropbox,不要說用NFS or curlftpfs or sshfs來做類似的應用(它們家的ssh service也沒有技援sshfs,這我也要抱怨一下),但還是有很多dropbox可以達到的方便性是上述方案做不到。此外,現階段已經有很多open source的dropbox相關軟體,其實群暉只要花點時間改一下應該就可以用到他們的產品上 :)。

上面講了那麼多不相關的東西,我還是要稱讚一下當天presenter的功力很棒,真是完全沒有冷場,2個小時根本就在歡笑中渡過。這應該算是我以前到現在所有參加過的宅宅活動裡頭,氣氛我覺得數一數二的好。此外當天是在君品酒店辦的,還有豐富的餐點,有考慮到有人是下班不吃飯直接衝去。


圖:少不了要有豐盛的食物

廢話到此,我還是稍微來看圖說故事以及部分的新功能介紹。請讓我以Ubuntu/Android user and programmer的角度來看這些新功能,由喜好程度不需要->很需要來介紹。

以下是「我不是企業用戶不需要這個功能」的功能
  • LDAP (還好我家只有5個人)
  • syslog aggregative (有經驗的阿宅網管應該會有自己的一套方法 )
  • Google cloud printer (我覺得有點不太實用,他有技援PDF or DOC?不論實用性,我是覺得不錯玩~ 好笑的是當天demo失敗,最後的presenter還補一槍)
  • 監控系統,跨瀏覽器、方便佈署、效能提升 (如果那天我家遭小偷了或許我會買個ip cam試試)
圖:新版支援統一管理LDAP

圖:demo google cloud print結果突搥了 XDDD

以下有了它「世界更美好」的功能
  • mount everything,簡單的說就是支援把別台電腦的samba資料匣mount到NAS上,還有mount iso檔。(很實用的功能,實作起來又非常非常非常簡單)
  • mobile app,也就是iOS or Android app也有支援軟體。(雖然還用不到,但上面可以做的東西大有可為)
  • 全新的相簿介面,又可同步於facebook相簿。(我家頻寬自己都不夠用了,還要給別人用)

圖:報告Mobile App的RD講者,可能原本就想說RD來報告一定很無聊,我想這位RD可以轉行做PM。

圖:PM在講相簿新增的功能

以下是「考試100分」的功能
  • 拖拉檔案上傳功能
  • Youtube下載功能
  • 免空下載功能
這三個功能是個人覺得比較有機會用到的功能,尤其是平常我常常在用bt抓ubuntu iso image(??),如果可以用拖拉方式上傳種子真是非常方便。(我還是想要有個人的dropbox啦)

講到拖拉種子進去網頁,如果Synology可以固定一個資料匣,讓我用網芳(NFS...)的方式拖拉進去,它就會幫我自動啟動Download Station抓資料,那我會覺得更實用。因為我根本就不想開網頁的管理介面。

結論

Synology的管理介面真的是獨樹一格,功能性也是NAS廠商中的佼佼者,我用了半年下來十分的滿意,我也因此慫恿了一些有相關需求的人買它們家的東西。

這次藉由參加這個活動,也開始思考我會希望他們再提供什麼功能,列舉如下
  • dropbox
  • version control file folder (具有版本控制的資料匣)
  • open api
  • 部分功能與nautilus or explorer結合

最後,若有興趣瞭解更多DSM 3.2 Beta功能的人可以參考當天投影片[這裡下載]

2011/06/09

zim plugins: 個人筆記軟體

Why zim?

前陣子開始習慣用zim來當做個人筆記的軟體,在使用zim之前我survey了許多其他筆記軟體,像是Evernote,Nevernote,Tomboy,gnote等。最後我還是選擇了zim,主要有以下原因
  • wiki語法
  • 所見即所得的介面
  • 筆記以文字檔儲存
  • 內建常用格式 (h1, h2, bold, italy, code...)
  • 容易hack (python)
  • 配合dokuwiki使用,可當公司內的文件分享系統
  • 配合dropbox,便成雲端筆記本
  • 配合shutter,螢幕截圖超方便
這篇文章,主要會介紹一個搜尋文件程式及如何將zim的文件發佈要dokuwiki上。


zim search

zim search是一個視窗程式,以wxPython寫成,輸入欲搜尋字串,它會將有此字串的文件列出,並依照權重排序,雙點任何列便可直接在zim中開啟該文件。此工具截圖如下


設定

這隻程式接受2個參數,第一為zim筆記本名,第二為筆記本路徑,zim裡的tools -> custom tools設定如下


源碼find.py可由此抓到 https://github.com/fcwu/zim-plugins

zim wiki deploy

為了分享我的筆記給其他同仁觀看,我架了dokuwiki當做分享平台,dokuwiki的儲存格式(文字檔)及wiki語法跟zim只有些許的不同,為了做語法的轉換及附件(圖片,或附檔)的發佈,因此我寫了這個腳本。

用此腳本發佈在dokuwiki的結果如下圖:


zim上觀看如下


設定

此腳本接受的參數如下
  1. 筆記本名
  2. dokuwiki root path
  3. user name
  4. 附件路徑
  5. 文本路徑
其中user name是用來區別的文件應該存放的位置。舉例來說dokuwiki root path為/var/www/wiki/,user name為doro則文件會發佈放在/var/www/wiki/data/pages/doro,附件會發佈在/var/www/wiki/data/media/doro

使用前請先確定已建立這些路徑,且擁有寫入權限。zim設定如下圖:


源碼deploy_wiki.py可由此抓到 https://github.com/fcwu/zim-plugins

2010/05/09

打造自己的VIM: 源碼追蹤 call tree (CCTree)

CCTree 是一個對於VIM使用者很方便的追蹤源碼工具。它主要提供2種功能,一是根據輸入的Symbol (函式名)產生所有呼叫到此symbol的函式名列表;或是根據輸入產生此symbol所有呼叫到的函式樹狀圖。

安裝此plugin的方式十分簡單,只需將CCTree.vim移至vim/plugin/底下便行。

在使用CCTree之前,請先產生cscope.out,若有不清楚的朋友們,可參考小弟之前的文章[源碼追蹤 ctags+cscope及預覽視窗SrcExpl]。在產生完後首先需下CCTreeLoadDB讀取cscope.out,這需要一些時間,接著就能開始使用CCTree了。CCTree使用上只有4個快速鍵,如下


舉例來說,我在LoadBmpImage下按下<C-\><,在VIM的左邊的window,便會顯示有2個函式呼叫它,如下圖:


若是在LoadBmpImage下按下<C-\>>在VIM的左邊的window,便會顯示有LoadBmpImage呼叫了多少函式,如下圖:


2010/04/14

透過SendMessage控制功能表項

前幾天有朋友問我怎麼在Windows中控制Windows Media Player的播放、停止等功能,可以做到此目的的方法有很多種,其中用Spy++及SendMessage可以輕易達成。我這裡稍微簡述一下方法,詳細流程可以參考[Interoperating with Windows Media Player using P/Invoke and C# - CodeProject]。

目的


為了方便說明,我改以控制PCMan中我的最愛其中之一的連結來說明。如下圖被框起來的功能表項。


手段


使用SendMessage摸擬功能表項被按下的動作。其中SendMessage的參數如下:


第一個參數可以透過FindWindow來找到,第二個參數因為是按功能表項所以必定是WM_COMMAND,第三及第四個參數較難取得,但我們可以透過Vistual Studio內附的Spy++來監視PCMan的WM_COMMAND訊息來取得。

首先打開Spy++並按下Ctrl-M,並用下圖紅框1的東東拖到PCMan選到正確視窗,如下圖紅框2。


接著按到訊息的Tab,選WM_COMMAND如下圖。


最後在PCMan內去按下[我的最愛]->[台大批踢踢實業坊],此時在Spy++內便會出現下圖訊息,按下右鍵選[屬性]後便能取得wParam及lParam。


在SendMessage四個參數都備齊後,我寫了一支程式去做SendMessage。底下是程式結果,其中程式的4個參數分別為Program ClassName、Event、wParam和lParam。


執行後ptt便會在PCMan中被打開了。MessageControl的源碼如下:

 1 // MessageControl.cpp : 定義主控台應用程式的進入點。
 2 //
 3
 4 #include "stdafx.h"
 5 #include <stdlib.h>
 6 #include <Windows.h>
 7
 8 struct EventMappingTable_t {
 9     LPCWSTR Name;
10     UINT Code;
11 } g_eventMapping[] = {
12     {_T("WM_COMMNOTIFY"), 0x0044}
13 };
14
15 int _tmain(int argc, _TCHAR* argv[])
16 {
17     if (argc != 5) {
18         fprintf(stderr"Usage: %S ClassName Event WPARAM LPARAM\n", argv[0]);
19         return -1;
20     }
21
22     HWND hWnd = FindWindow(argv[1], NULL);
23     if (hWnd == NULL) {
24         fprintf(stderr"Cannot find window: %S\n", argv[1]);
25         return -2;
26     }
27
28     WPARAM wParam;
29     LPARAM lParam;
30     UINT eventID = 0;
31     UINT i;
32     for (i = 0; i < sizeof(g_eventMapping)/sizeof(EventMappingTable_t); ++i) {
33         if (_wcsicmp(g_eventMapping[i].Name, argv[2]) == 0) {
34             eventID = g_eventMapping[i].Code;
35             break;
36         }
37     }
38     if (i >= sizeof(g_eventMapping)/sizeof(EventMappingTable_t)) {
39         fprintf(stderr"Cannot Event: %S\n", argv[2]);
40         return -3;
41     }
42
43     wParam = wcstol(argv[3], NULL16);
44     lParam = wcstol(argv[4], NULL16);
45     SendMessage(hWnd, eventID, wParam, lParam);
46     return 0;
47 }
48

2009/02/01

Ubuntu: convert wav file to mp3

最近想在每天坐捷運時練練英文,我自認為英文讀寫的能力還不錯(比起聽說,聽說應該是爛到爆),所以買了一本比較注重生活會話的雜誌來每天閱讀,不知道這股拚勁什麼時候會消磨光 :)。那本雜誌的會話光碟是給wav檔,我的ipod nano沒法放那種檔案,所以只好先來轉檔了。(ipod nano是我可愛的女友送我的,大概用了2個禮拜,心得是"頗爛"。原因由iTune不好用,放歌很麻煩,音質不好)

前面都是廢話,跟本篇的主題一點關係都沒有。在Ubuntu中轉wav檔成mp3檔很簡單,先安裝lame
sudo aptitude install lame
接著再使用lame指令來轉,像是
lame -h -b 128 1.wav 1.mp3
上面是第一個方法,再介紹另一個方法,在ubuntu 8.10中的nautilus中己經有script可以幫助轉檔了,安裝這個套件 nautilus-script-audio-convert,再右鍵點選欲轉檔的檔案,選Scripts->ConvertAudioFile,接著steps by steps就完成轉檔了。

2009/01/30

Write OS: 使用開源軟體-自己動手寫作業系統

今天終於把[使用開源軟體-自己動手寫作業系統]看完,我一直都對寫作業系統很有興趣,但是一直遲遲找不到一個好的開始,因此很感謝[楊文博]寫得這本免費電子書, 讓所有有心專研這方面的人能有個完整的學習, 雖然現在這本書還沒完成,但讀完後還是授益匪淺。

目前這本書完成了3章,首先第一章的計算機啟動介紹了計算機啟動方式,基本硬體簡介及開發OS時所需使用的開源軟體。

第2章則由OS版的Hello World開始介紹(example 2-1),並進一步將Hello World放至FAT12的File system裡以擺脫512Bytes (Sector size)的限制 (example 2-2)。

第3章則由real mode進入了protected mode,本章第一個例子 (example 3-1) 便說明了GDT (Global Descriptor Table),Segment Selector 的重要觀念, 並且使用了 far jump 跳到 protected mode。接著 example 3-2 則代入了LDT (Local Descriptor Table),LDT的存在主要是為了 multi-task 環境所設計,不同的 task 擁有自己的記憶體區段。在Descriptor裡,為了使OS更加安全,descriptor包含了權限的設計,Intel設計了ring 0(高)到ring 3(低)來加以區隔 user/kernel permission,為了使權限平和的轉移,便設計了call gate來輔助,call gate說穿了只是一種特殊的descriptor,example 3-3 展示了如何使用 call gate 由一 segment 跳至另一 segment。在 example 3-3尚未展示真正的權限轉移,example 3-4做了這方面的修正,由高權限跳至低權限。example 3-5則由低權限跳至高權限,並且一起做了Task State切換(TSS: Task State Segment)。Example 3-6開始使用了paging的技術,Example 3-7則對Page Directory Size根對計憶體大小作一最佳化,Example 3-8則真的了展示Virtual memory的作用。


最後,對於有心要寫OS的人,Intel的這本書[Intel® 64 and IA-32 Architectures Software Developer's Manual Volume 3A: System Programming Guide]的前幾章有些章節是必讀的,有心的人可以自己下載回來看看,想要紙本的人,也可以跟他們要。

2008/07/08

[Wargame]ccu Middle ~ Mid04

Middle
Given:
  1. 一個看不到目錄內容的目錄
  2. Nothing ...
Thinking:
  1. 猜吧...
  2. shell的執行檔名稱 ...

Mid01
Given:
  1. 'less' with setuid
Thinking:
  1. how to execute a external program by that program
  2. man less!!

Mid02
太簡單


Mid03
Given:
  1. 一堆指令
  2. A program with setuid attribute is at ~mid04/bin/myshell
Thinking:
  1. Restricted-shell. How to escape?? vim??

Mid04
Given:
  1. A backdoor at??
  2. The password of backdoor
Thinking:
  1. 登入後門後,建一個可以讓mid04轉到mid05的setuid程式。

2008/07/07

[Wargame]ccu Basic 6~9

Basic 6
Given:
  1. A file but where?
  2. DES code
Thinking:
  1. scanning port by nmap
  2. get master.passwd
  3. crack the password by John the ripper

Basic 7
Given:
  1. The password is inside the binary program
Thinking:
  1. How to get the strings inside the program (strings)


Basic 8
Given:
  1. A program with setuid and the source code
Thinking:
  1. 可以在source code內找到它運用了getuid這個function,而此function是由某個library提供的。
  2. 是否可以用某些方式讓該程式不要去讀取原本的library,而去讀取我們自己的library
  3. LD_PRELOAD ??


Basic 9
Given:
  1. A program with buffer overflow vulnerability
Thinking:
  1. 有一變數在複製資料進去時,並沒有做bound checking,也因此我們可利用寫超過的資料去覆蓋程式中其他變數的值

2008/07/06

[Wargame]ccu Basic 0~5

台灣冒險傢俱樂部共有20關,分別從Basic 0~9,Mid00~Mid09

Basic 0
Given:
  1. A hostname
  2. Password hint
    • 第1至第4個及第7個字元在密碼表裡
    • 第5,6,8個字元為任意字元
Thinking:
  1. 使用nmap去掃主機上的有開那些port,再telnet看看吧
  2. 任意字元是什麼意思,可以由shell來思考。

Basic 1
Given:
  1. A program with setuid
  2. The source code of the setuid program
Thinking:
  1. 看到該程式source code呼叫了system並且其參數不是使用絕對路徑,是否能改變系統找程式的路徑?
  2. 試試shell變數 path
Basic 2
Given:
  1. nslookup with setuid
Thinking:
  1. nslookup是否可執行外部程式,或是否有執行外部程式?help??
  2. PAGER及PATH環境變數

Basic 3
Given:
  1. A program with setuid
Thinking:
  1. system函式的參數直接由外部存取,Command injection?


Basic 4
Given:
  1. r-family指令, such as rsh, rcp...
Thinking:
  1. 發現.rhost將權限給expose出來了

Basic 5
這關太智障,猜一下就出來了。


待續...

2008/07/05

Wargame

Wargame為專為有心成為駭客的玩家所設計的遊戲,當初我會接觸這類型的遊戲主要是因為學校的修課,那門課的期末project評分方式就是以你過了多少wargame,在那1~2個月裡,我過了一堆wargames並且將他們寫成了報告,從今天開始我會將這些報告整理出來,並且寫到這個部落格里讓大家參考解法,但為了保持wargame的挑戰性,答案我還是儘可能不會直接寫出來。

以下是wargame網站的列表(我只列出我有玩的, ps. 有些大陸的wargame十分智障,可以不去玩):
另外,有幾本書可以參考:

2008/03/15

Gnucash: A personal finance tracking program

一個在Linux下的資金管理程式。

有興趣的人可以看以下介紹:
  • http://blog.xuite.net/michaelr/linux/16188248
  • http://blog.xuite.net/michaelr/linux/16196502
  • http://blog.xuite.net/michaelr/linux/16196596
  • http://blog.xuite.net/michaelr/linux/16196657

2008/03/12

Profiling tool: Valgrind with cachegrind

以下摘自官網:
Valgrind is an award-winning instrumentation framework for building dynamic analysis tools. There are Valgrind tools that can automatically detect many memory management and threading bugs, and profile your programs in detail. You can also use Valgrind to build new tools.
其中有個extension(skin)叫做cachegrind可用來做profile,而且還有qt-based的結果顯示介面,我做了個擷圖如下:

測試程式是apache。

在ubuntu上安裝這些軟體很方便,全部都apt-get就行。感謝製作軟體、維護套件庫的大家。

Ref.
Valgrind http://valgrind.org/

Profiling Apache 1.3.34 using GProf

因為某些原因必需profile apache 1.3.34,其中與一般使用gprof不同的是編譯時要加特別的參數,我將過程紀錄如下,其中有些是pseudo code。

$ tar xvf apache1_3_34.tbz
$ cd apache
$ ./configure --prefix=/home/fcwu/apache/working --enable-module=rewrite --enable-module=proxy
$ cat replace_cflags.sh
1 #!/bin/bash
2
3 TMP=`mktemp`
4 REPLACE="-pg -DGPROF -g -DNO_USE_SIGACTION -fno-stack-protector -fno-stack-protector-all"
5 #REPLACE="-pg -DGPROF -g -DNO_USE_SIGACTION -fno-stack-protector"
6 #REPLACE="-pg -DGPROF -g -DNO_USE_SIGACTION "
7
8 for file in `find src/ -name "Makefile"` ; do
9 echo "[Replace file=$file]"
10 grep -nH "^CFLAGS=" $file
11 sed "s/^CFLAGS=/& $REPLACE /" $file > $TMP
12 cp $TMP $file
13 grep -nH "^CFLAGS=" $file
14 done
15
16 rm -f $TMP
$ ./replace_cflags
$ make
$ cd src
$ gcc -static -pg -g -DLINUX=22 -DHAVE_SET_DUMPABLE -DNO_DBM_REWRITEMAP -DUSE_HSREGEX -g -pg `./apaci` -rdynamic -o httpd buildmark.o modules.o modules/standard/mod_env.o modules/standard/mod_log_config.o modules/standard/mod_mime.o modules/standard/mod_negotiation.o modules/standard/mod_status.o modules/standard/mod_include.o modules/standard/mod_autoindex.o modules/standard/mod_dir.o modules/standard/mod_cgi.o modules/standard/mod_asis.o modules/standard/mod_imap.o modules/standard/mod_actions.o modules/standard/mod_userdir.o modules/standard/mod_alias.o modules/standard/mod_access.o modules/standard/mod_auth.o modules/standard/mod_setenvif.o main/alloc.o main/buff.o main/http_config.o main/http_core.o main/http_log.o main/http_main.o main/http_protocol.o main/http_request.o main/http_vhost.o main/util.o main/util_date.o main/util_script.o main/util_uri.o main/util_md5.o main/rfc1413.o os/unix/os.o os/unix/os-inline.o ap/ap_cpystrn.o ap/ap_execve.o ap/ap_fnmatch.o ap/ap_getpass.o ap/ap_md5c.o ap/ap_signal.o ap/ap_slack.o ap/ap_snprintf.o ap/ap_sha1.o ap/ap_checkpass.o ap/ap_base64.o ap/ap_ebcdic.o ap/ap_strtol.o regex/regcomp.o regex/regexec.o regex/regerror.o regex/regfree.o \
modules/proxy/proxy_cache.o modules/proxy/proxy_connect.o modules/proxy/proxy_ftp.o modules/proxy/proxy_http.o modules/proxy/proxy_util.o modules/proxy/mod_proxy.o \
modules/standard/mod_rewrite.o \
-lm -lcrypt -lexpat -ldl -fno-stack-protector
$ make install
$ cd ~/apache/working/bin/
$ ./httpd -X -f /home/fcwu/apache/working/conf/httpd.conf
testing it
$ gprof ./httpd ../logs/gmon.out

其中有個重點是在編譯apache時,要用幾個特別的define值:"-DGPROF -DNO_USE_SIGACTION"。而為了讓gprof能work要加-pg的編譯參數,再為了讓時間的結果跑出來,必需用static的方式把所有的library以靜態的方式將所有想profile的部分編入(這就是我gcc很長長長的那一行)。

另外有些小技巧像是find的使用,我在測時intensively使用,像是:
find ~ -name "gmon.out" -exec ls -al {} \;
find ~ -name "gmon.out" -exec rm -i {} \;