2013/11/14

使用 GDB 以樹狀方式將函式流程印出


若在 Linux Kernel 內,想追蹤每個函式的呼叫流程,第一個會想到的工具應該是 ftrace;那針對 user space 的程式是否有類似的東西?用 gdb,再加上一些簡單 script 就可以完成。

以 xdotool 為例,舉例來說,xdotool getmouselocation 將會得當前鼠標的位置,正常狀況下輸出結果如下:

$ xdotool getmouselocation
findclient: 65011716
x:2769 y:656 screen:0 window:65011716

若搭配本文將介紹的方法,輸出結果如下:

(gdb) r
Starting program: /usr/bin/xdotool getmouselocation
[Thread debugging using libthread_db enabled]
Using host libthread_db library "/lib/x86_64-linux-gnu/libthread_db.so.1".
| main at xdotool.c:287
| _start at ??:0
  | __libc_start_main at ??:0
    | xdotool_main at xdotool.c:290
    | xdotool_main at xdotool.c:316
      | args_main at xdotool.c:456
      | args_main at xdotool.c:493
        | xdo_new at xdo.c:89
        | xdo_new_with_opened_display at xdo.c:106
        | xdo_new_with_opened_display at xdo.c:131
          | xdo_enable_feature at xdo.c:2053
        | xdo_new_with_opened_display at xdo.c:140
          | _xdo_populate_charcode_map at xdo.c:1360
            | _keysym_to_char at xdo.c:1390
      | args_main at xdotool.c:509
        | context_execute at xdotool.c:519
        | context_execute at xdotool.c:536
          | cmd_getmouselocation at cmd_getmouselocation.c:3
          | cmd_getmouselocation at cmd_getmouselocation.c:38
            | consume_args at xdotool.c:46
          | cmd_getmouselocation at cmd_getmouselocation.c:40
            | xdo_mouselocation2 at xdo.c:858
            | xdo_mouselocation2 at xdo.c:886
              | xdo_window_find_client at xdo.c:1222
                | xdo_getwinprop at xdo.c:1541
            | xdo_mouselocation2 at xdo.c:889
              | xdo_window_find_client at xdo.c:1222
                | xdo_getwinprop at xdo.c:1541
              | xdo_window_find_client at xdo.c:1241
                | xdo_window_find_client at xdo.c:1222
                  | xdo_getwinprop at xdo.c:1541
                | xdo_window_find_client at xdo.c:1241
                  | xdo_window_find_client at xdo.c:1222
                    | xdo_getwinprop at xdo.c:1541
findclient: 65011716
            | xdo_mouselocation2 at xdo.c:909
              | _is_success at xdo.c:1533
          | cmd_getmouselocation at cmd_getmouselocation.c:48
            | xdotool_output at xdotool.c:583
x:2262 y:689 screen:0 window:65011716
      | args_main at xdotool.c:511
        | xdo_free at xdo.c:144

是不是整個程式內函式呼叫順序都一目瞭然。


快速開始


先安裝 debug symbol,可以參考這裡將 debug symbol 來源設好。 接著安裝這 2 個套件 libxdo2-dbgsym xdotool-dbgsym

$ sudo apt-get install libxdo2-dbgsym xdotool-dbgsym
$ apt-get source xdotool
$ cd path/to/xdotool/source
$ wget https://gist.github.com/fcwu/7466813/raw/69daa7ad2227eb99e66b87e832e04ad8a8798385/supertrace.gdb
$ wget https://gist.github.com/fcwu/7466823/raw/fb9fee4cf987aaa291bef7fb50959e9eb0f5247b/supertrace.py

準備工作完成。把 gdb 跑起來吧!

$ gdb -x supertrace.gdb --args xdotool getmouselocation
(gdb) c
Starting program: /usr/bin/xdotool getmouselocation
[Thread debugging using libthread_db enabled]
Using host libthread_db library "/lib/x86_64-linux-gnu/libthread_db.so.1".
| main at xdotool.c:287
| _start at ??:0
  | __libc_start_main at ??:0
    | xdotool_main at xdotool.c:290
    | xdotool_main at xdotool.c:316
      | args_main at xdotool.c:456
      | args_main at xdotool.c:493
以下略...


深入一點


GDB 指令檔:supertrace.gdb


裡頭會載入 supertrace.py (本文末),supertrace.py 內,提供了 2 個指令 breakall and supertrace 和 1 個函式 lastbp。breakall 會把所有有 debug info 的函式當做追蹤目標,指令 xdotool 因為安裝了 xdotool-dbgsym 確定有 debug info 外,shared library 的部分可以用 info sharedlibrary 來觀察:

(gdb) info sharedlibrary 
From                To                  Syms Read   Shared Object Library
0x00007ffff7ddaaf0  0x00007ffff7df4eba  Yes (*)     /lib64/ld-linux-x86-64.so.2
0x00007ffff7bd12d0  0x00007ffff7bd5f28  Yes         /usr/lib/libxdo.so.2
0x00007ffff78d7570  0x00007ffff793ffe8  Yes (*)     /lib/x86_64-linux-gnu/libm.so.6
0x00007ffff75b5a70  0x00007ffff763d6c8  Yes (*)     /usr/lib/x86_64-linux-gnu/libX11.so.6
0x00007ffff73971e0  0x00007ffff739a6b8  Yes (*)     /lib/x86_64-linux-gnu/librt.so.1
0x00007ffff6ff3fa0  0x00007ffff71385d0  Yes (*)     /lib/x86_64-linux-gnu/libc.so.6
0x00007ffff6dd0360  0x00007ffff6dd2d88  Yes (*)     /usr/lib/x86_64-linux-gnu/libXtst.so.6
0x00007ffff6bcc9f0  0x00007ffff6bcd318  Yes (*)     /usr/lib/x86_64-linux-gnu/libXinerama.so.1
0x00007ffff69b7350  0x00007ffff69c36d8  Yes (*)     /usr/lib/x86_64-linux-gnu/libxcb.so.1
0x00007ffff67aade0  0x00007ffff67ab918  Yes (*)     /lib/x86_64-linux-gnu/libdl.so.2
0x00007ffff6592740  0x00007ffff659e358  Yes (*)     /lib/x86_64-linux-gnu/libpthread.so.0
0x00007ffff637f490  0x00007ffff63894f8  Yes (*)     /usr/lib/x86_64-linux-gnu/libXext.so.6
0x00007ffff6179d90  0x00007ffff617aae8  Yes (*)     /usr/lib/x86_64-linux-gnu/libXau.so.6
0x00007ffff5f74090  0x00007ffff5f75aa8  Yes (*)     /usr/lib/x86_64-linux-gnu/libXdmcp.so.6
(*): Shared library is missing debugging information.

值得注意的是若是觀察的 library 太多,會因為 debug info 太大,啟動速度變很慢。接著在 supertrace.gdb 裡用了 lastbp 函式取得最後的 breakpoint number,等會設 breakpoint command 會用。

最後,在 breakpoint command 裡,最重要的就是 supertrace 這個命令,它主要會收集 backtrace 的輸出,並拿來跟之前輸出比較,將最後結果印出。


2013/11/12

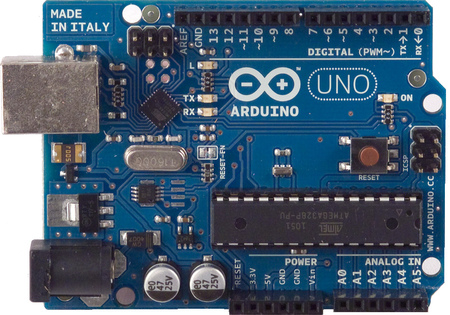
使用 Arduino 及 Android 自製萬能遙控器 (4) - Arduino on ASUSTOR's NAS and Demo


(圖:在電視前多放了一塊板,還好不會太突兀)

還是稍微提一下前三篇提到的四隻主要程式

  1. web.py
  2. iremote (Android App)
  3. serial_tx.c
  4. ir-tx.cpp

現在只需再將 Arduino 放到 ASUSTOR NAS 上執行就完成了。

因為我在 NAS 已經放了個 Ubuntu 12.04 的環境了,所以需要完成的只剩 serial driver 的部分。Arduino 所要用的 driver 為 cdc-acm.c。在編成 .ko 時,會發生以前曾經遇到的問題 Unknown symbol and disagree about version of,所有的解決方法可參考以前寫的這篇這篇即可。

這次用很髒的方法來解,直接將有問題的函式用它的位址直接取代,如下:

// doro <<
#undef dev_info
#define dev_info(dev, fmt, arg...) _dev_info2(dev, fmt, ##arg)
int (*_dev_info2)(const struct device *dev, const char *fmt, ...) = (void *)0xffffffff8140a280;
int (*dev_warn2)(const struct device *dev, const char *fmt, ...) = (void *)0xffffffff8140a340;
int (*device_create_file2)(struct device *device, const struct device_attribute *entry) = (void *)0xffffffff8140a150;
void (*device_remove_file2)(struct device *dev, const struct device_attribute *attr) = (void *)0xffffffff8140a060;
int (*dev_err2)(const struct device *dev, const char *fmt, ...) = (void *)0xffffffff8140a3a0;
// doro >>

完整程式可參考 cdc-acm.c

最後 demo 影片:用手機操作電視


2013/11/11

使用 Arduino 及 Android 自製萬能遙控器 (3) - Arduino 環境 及 Serial 程式


接下來終於要進入高潮了,這篇會有點長,要介紹的主題包含硬體架設,在 Ubuntu 上開發 Arduino,Arduino 紅外線發送接收程式,及 Ubuntu 的 Serial 程式。


準備硬體


接法及紅外線簡介可參考這篇,非常詳細。其中要注意的是每個人用的紅外線接收零件可能略有不同,請一定要照規格上的腳位接。

以我這裡用的 TL1838


接收部分,接完長這樣


發送時,接完長這樣


(這張圖好像接反了,總之 LED 長腳接 pin 3,短腳接地)

開發環境


安裝 Arduino 開發環境,在 Ubuntu 12.04 上只需

sudo apt-get install arduino arduino-core arduino-mk

此外,還需要紅外線控制(編解碼)的 library Arduino-IRemote

cd /usr/share/arduino/libraries/
sudo git clone https://github.com/coopermaa/Arduino-IRremote IRemote


接收 Go!


選擇 Arduino IDE 的 File —> Examples —> IRemote —> IRecvDump 程式就跑出來了,在前幾行的地方,有個 RECV_PIN 從 11 改成 4,如下:

int RECV_PIN = 4;

程式上傳後,打開內建的 Serial Monitor,再拿著遙控器對著接收器隨便按個幾個鍵,紅外線的編碼即會顥示出來,接下來要做的就是將等會要用到按鍵都按過一輪,並記下來,如下圖:


發送 Go!


我家電視的遙控器是 NEC 32 bits 編碼,並且加入從 serial 讀進指定字元,傳出對應的紅外線:

if ((d = Serial.read()) != -1) {
        switch (d) {
            case '1': code = 0x1CE3807F; break;
            case '2': code = 0x1CE340BF; break;
            case '3': code = 0x1CE3C03F; break;
            case '4': code = 0x1CE320DF; break;
            case '5': code = 0x1CE3A05F; break;
            case '6': code = 0x1CE3609F; break;
            case '7': code = 0x1CE3E01F; break;
            case '8': code = 0x1CE310EF; break;
            case '9': code = 0x1CE3906F; break;
            case '0': code = 0x1CE300FF; break;
            case 'q': code = 0x1CE3708F; break; // volume up
            case 'a': code = 0x1CE3F00F; break; // volume down
            case 'w': code = 0x1CE350AF; break; // channel up
            case 's': code = 0x1CE3D02F; break; // channel down
            case 'e': code = 0x1CE3C837; break; // source
            case 'd': code = 0x1CE3A25D; break; // enter
            case 'p': code = 0x1CE348B7; break; // power
            default: code = 0;
        }
        if (code != 0) {
            irsend.sendNEC(code, 32);
        }

完整的程式可參考 github 上的 ir-tx.cpp


使用指令編繹、上傳


這支程式計畫是要在 NAS 上跑,NAS 上用指令編譯上傳會比較方便,所以若是需要用指令編譯的話,要先準備一隻 Makefile,內容如下:

BOARD_TAG = uno
ARDUINO_PORT = /dev/ttyACM0
ARDUINO_LIBS = IRremote
ARDUINO_DIR = /usr/share/arduino
include /usr/share/arduino/Arduino.mk

.PHONY: minicom

minicom:
    sudo minicom -D ${ARDUINO_PORT} -b 9600 -o

在原本的 Arduino 程式內需加上一些 header,舉例來說之前的 ir-tx.cpp 需在開頭加入:

#include <arduino.h>
#include <hardwareserial.h>

接著在放程式及 Makefile 目錄下:

make  # 編譯
make upload  #上傳
make minicom  # 打開 minicom

即可編譯,上傳。


Serial 程式


在確定用 minicom 傳接都沒問題後,在上一篇內有提到一隻 web.py 裡頭呼叫了外部程式 serial_tx 來傳送 serial 字元給 arduino,這程式請參考 serial_tx.c

若是發生 minicom 可正常傳接收串列資料,但自己的程式不行,可用 stty 來輔助除錯,它可將串列設定全都印出。

2013/11/05

使用 Arduino 及 Android 自製萬能遙控器 (2) - Android App 及 RESTful HTTP Server


(來源)

前情提要

Android App IRemote 會讓使用者直接藉著這個 App 發送指令給 NAS,NAS 準備了一隻 HTTP Server 接收這些指令。目前,只提供 2 組指令:

  1. 取得按鍵列表: curl -i http://localhost:8850/keys
  2. 按下按鍵,本例為按鍵 1: curl -i http://localhost:8850/keys/1

使用 python 寫 RESTful Service 非常容易,配合 Flask module 整隻程式不到 50 行就解決了,程式可參考這裡,所有的按鍵在程式一開頭的變數 keys 定義了。想要更進一步了解 Flask 的用法,可以參考這篇寫得相當不錯。

接著是 Android App IRemote [github]。這隻程式的重點,沒有重點,大致上來說就是按下按鍵時,去叫一隻繼承 AsyncTask 的 SendCommandTask,裡頭會幫忙送出 HttpRequestBlocking (使用 java.net.HttpURLConnection),最後再用 org.json.JSONObject 來解析回傳的 json。

相關的 IP:Port 設定都放在 AppRemote.java 這個所有 Activities 共用的物件裡。

程式畫面如下,簡單用 TableLayout 畫出,及一些 drawable 的按鈕外觀設定。


這篇真是入門的可以了...

2013/11/04

使用 Arduino 及 Android 自製萬能遙控器 (1) - 前言及架構


前言


前陣子那有趣的案子做完後,又想起以前還有東西想做沒空做的想法:用電腦來控制家庭內的所有紅外線設備。

會想做這個主題是因在前公司華芸時,做了個 Boxee 及那精美的手機 App AiRemote 直接可操作 Boxee。因為員工的關係,家裡的客廳也攞了台相同的東西,平常拿來看看日劇電影什麼的非常爽快。但可惜的是對於像我這種沙發馬鈴薯而言,光要手抬起來拿起電視遙控器,切到 HDMI,再拿起手機操作 Boxee ,就要我的命了。為什麼不直接用手機直接操作電視就好。

當然上網找一下就可以找到類似的解決方案,只是我挑了個工程師最喜歡動手做的方案:自已用 Arduino 及家裡的 NAS 兜一個來玩。

架構


這個系統的架構很簡單,包含了

  • Android App 透過 WIFI 告訴 NAS 使用者按了什麼鍵
  • NAS 會有一隻 HTTP Server 接收 Android App 命令,再由 serial port 將命令傳送給 Arduino
  • Arduino 接收到 serial 傳過來的命令後,再由它的 IR Tx 將紅外線放送個其它電器

以上,總共會寫 4 隻程式,程式全都放在 github https://github.com/fcwu/iremote 上。這 4 隻程式分別為

  1. Android App IRemote
  2. HTTP Server, written in Python, with RESTful API design
  3. Serial Tx
  4. Arduino IR

另外有些其他細節所需程式就等之前講到該章節時,再行介紹。預計接下來還會有以下幾篇介紹:

(1) - 前言及架構
(2) - Android App 及 RESTful HTTP Server
(3) - Arduino 環境 及 Serial 程式
(4) - Arduino on ASUSTOR's NAS and Demo

demo:

2013/10/30

初嚐 Greasemonkey: LpTable


有時會想要在任意的網頁上加入一些特殊設定或是需要重新排版成看起來比較爽的頁面,舉例來說:在 facebook 的登入畫面做一個快速切換帳號的按紐;又或是最近在用 Lauchpad 的 bugs 覺得它的排版很鳥,所以自己重新用 jQuery 的 tablesorter 重新排一下。

想要解決這樣的問題,一來是可以寫瀏覽器的外掛來改,二或是用我今天要介紹的方法 userscript 來達成,以 firefox 的使用者需要先安裝 greasemonkey,chrome 的使用者則要安裝 tampermonkey

這次就 Launchpad 為例,原先 Launchpad 的 bug 列表長這樣


經過了 LpTable 的 script 會變這樣


Firefox 的使用者來說,在安裝完 greasemonkey 後,再到 LpTable 的頁面按下 Install 即可使用了


基本上寫這些 script 如果已有網頁基本能力寫起來很容易,因此我就在做 LpTable 用到的一些手法來介紹。


jQuery


要在 userscript 裡載入其他 javascript 檔,只需在檔頭的部分加入 @require filepath 即可,如下:

// @require     http://ajax.aspnetcdn.com/ajax/jquery/jquery-1.7.2.js
// @require     http://datatables.net/release-datatables/media/js/jquery.dataTables.js


CSS


要加入自訂的 CSS 也有幾種方法可以用,舉例來說第一種用 GM_getResourceText,再用 GM_addStyle 將樣式加入,在使用之前記得要先用 @grant 取得權限。又或是用比較原始的的手法,自己建立一個 style element 插在 head 裡如下:

function initStyleSheets() {
    function addGlobalStyle(css) {
        var head, style;
        head = document.getElementsByTagName('head')[0];
        if (!head) { return; }
        style = document.createElement('style');
        style.type = 'text/css';
        style.innerHTML = css;
        head.appendChild(style);
    }

    var css_alert = '.alert {padding: 15px; margin-bottom: 20px; border: 1px solid transparent; border-radius: 4px; color: #468847; background-color: #dff0d8; border-color: #d6e9c6}';

    addGlobalStyle(css_alert);
    var stylesheets = ['https://dl.dropboxusercontent.com/u/23905041/media/css/demo_table.css',
                       'https://dl.dropboxusercontent.com/u/23905041/media/css/jquery.dataTables.css'
                       ];
    $.each(stylesheets, function(index, value) {
        var link = window.document.createElement('link');
        link.rel = 'stylesheet';
        link.type = 'text/css';
        link.href = value;
        document.getElementsByTagName("HEAD")[0].appendChild(link);
    });
}


Persistent Storage


要將某些資料存起來,在下次 reload 網頁時再用,可用 GM_getValue and GM_setValue 這組 API。使用前記得要 grant 權限,


TableSorter


最後是關於網頁表格的應用,跟 greasemonkey 完全沒關係。當初是希望能有一個表格,可輕鬆動態插入資料,排序,過濾資料,google 一下很快就找到了 TableSorter 這個 jQuery plugin。這部分的線上文件範例都超多,自己網上看看吧。

2013/10/13

desktop-mirror 串流螢幕上的影像及聲音到其他電腦上


desktop-mirror 最近在玩的 project,這隻程式主要是讓使用者的電腦上的畫面及聲音可以即時傳送給其他同網域的電腦,相類似的應用如 AirPlay Mirroring and Miracast

所有程式可在 github 上找到。


目前 desktop-mirror 在以下環境下測試皆能順暢的分享螢幕上畫面及聲音 Windows 7, Ubuntu 12.04 and XBMC。以下是實際使用的影片:


技術細節 - 影音串流


螢幕畫面的串流是用 ffmpeg 及 crtmpserver。其中,ffmpeg 配合著影像輸入為 x11grab (Ubuntu) 或 dshow (Windows) 將影像編碼成 H.264 baseline profile,聲音則是輸入為 ALSA 編碼成 mp3,最後封裝成 flv ,透過 TCP 傳出去。在接收端為非 XBMC 的情形下,ffmpeg 會將輸出結果送至 crtmpserver,接著 crtmpserver 為改成用 rtmp protocol 等待接收端來要求影音。

在這整個流程中有很多其他選擇,但考慮到跨平台及不同的接收端,最後才採用這樣的(奇怪)組合。

技術細節 - Windows/Ubuntu 平台移植


這隻程式使用的語言及 GUI library 是 wxPython,因此在各個平台之間的移植沒遇到什麼大問題。當然,前提是在選擇 library 及 external program 要十分注意,像是 mDNS (Avahi/Bonjour) 在 python 上介面是不是跨平台等。

唯一踩到的地雷是在 python 處理 process 輸出時用到的 select/epoll,這類的 function 在 Windows 上只支援 socket descriptor,因此重新用 Queue 及 thread 重新做了一個類似功能的東西。

最後打包成安裝檔的部分。在 Windows 就準備 py2exe,一堆的動態鏈結的程式庫和執行檔,及 NSIS 的包裝檔。Ubuntu 的部分則就準備 debianize 的資料匣,再準備個 recipe 讓它定期自行去 github import 程式,再自動編成 package 放到 PPA。

最後


這個 project 自認為很好玩,也還有一些遠端遙控的部分功能可以加強,只是我又想到別的好玩東西了,這個案子就做到這裡就好。

後記:參加了 QNAP 舉辦的 APP 競賽得到了第一名節殊榮


2013/09/29

LXC 入門

上週受邀給了一個 LXC 的 talk,本來預期是給大家入門,結果沒想到來的都是 KVM 的高手。造成一開始沒多久就爆走了,真對不起當天來的聽眾,以下是投影片


(這個月很忙,結果一個月只寫一篇文章...)

2013/08/19

Automated GUI testing of Linux Application


前陣子在用 Ubuntu 開機光碟自動化時,查了一下要如何用程式來控制 UI,在 Stackoverflow 上查到了一篇文章,原文節錄如下:


There are two different kind of tools that I know:

Based on the accessibility layer: LDTP, dogtail, strongwind
Based on image recognition: sikuli, xpresser


試用了其中的 LDTP 發覺十分好用,今天便來介紹這個工具

安裝


sudo apt-get install python-ldtp


測試一下吧!


在開始之前,想了解更多一定要參考一下這份 LDTP Tutorial,裡頭的例子是很好的入門。

開始使用 ldtp,由於是它是藉著 a11y 來控制 UI,所要先將 a11y enable

$ gsettings set org.gnome.desktop.interface toolkit-accessibility true


以下例子會用到的 ldtp functions 有

  • getwindowlist
  • getobjectlist
  • getobjectinfo
  • getobjectproperty
  • selectmenuitem

取得目前開啟的視窗

>>> from ldtp import *
>>> getwindowlist()
['frmDesktop', 'frmHome', 'frmmedia', 'dlg0', 'dlg1', 'dlg2', 'dlg3', 'dlg4', 'dlg5', 'dlg6', 'dlg7', 'dlg8', 'dlg9', 'dlg10', 'dlg11', 'dlg12', 'dlg13', 'dlgQuestion', u'frmBlogger\uff1aDoroOneTwoThree-\u4fee\u6539\u6587\u7ae0-MozillaFirefox', 'dlgOracleVMVirtualBoxManager', 'frmSystemSettings', 'frmNotes-Zim', 'frm/bin/bash', 'frmldtp-tutorial.pdf', 'frmutils.py(~/src/gnome/ldtp-2.3.1/ldtpd)-GVIM', 'frmgedit', 'pnl0', 'pnl1', 'pnl2', 'pnl3', 'pnl4', 'pnl5', 'pnl6', 'pnl7']


找一下 gedit 裡有那些 menu 可以按

>>> [i for i in getobjectlist('*gedit*') if i.startswith('mnu')]
['mnuFile', 'mnuMakefile', 'mnuObjective-C', 'mnuEiffel', 'mnuMarkdown', 'mnuHighlightMode', 'mnuDPatch', 'mnuEmpty', 'mnuGraphvizDot', 'mnuDTD', 'mnuOpal', 'mnuEmpty6', 'mnuEmpty7', 'mnuEmpty4', 'mnuEmpty5', 'mnuEmpty2', 'mnuEmpty3', 'mnuView', 'mnuEmpty1', 'mnuEmpty8', 'mnuEmpty9', 'mnuGtkRC', 'mnuDiff', 'mnuQuit', 'mnugtk-doc', 'mnuSPARQL', 'mnuCloseAll', 'mnuOctave', 'mnuBoo', 'mnuRPMspec', 'mnuObjective-J', 'mnuBottomPanel', 'mnuSystemVerilog', 'mnuClearHighlight', 'mnuPreviousTabGroup', 'mnuawk', 'mnuDefaults', 'mnuEmpty10', 'mnuEmpty11', 'mnuEmpty12', 'mnuSelectAll', 'mnuTcl', 'mnuPlainText', 'mnudesktop', 'mnuScripts', 'mnuCobol', 'mnuAbout', 'mnuCopy', 'mnuVala', 'mnuTranslateThisApplication', 'mnuToolbar', 'mnuJSON', 'mnuCut', 'mnuPrint', 'mnuPascal', 'mnuDOSBatch', 'mnuLiterateHaskell', 'mnu168', 'mnuAutomake', 'mnuChangeLog', 'mnuHaddock', 'mnuini', 'mnuASP', 'mnuSaveAll', 'mnuGotoLine', 'mnuStatusbar', 'mnuImageJ', 'mnuF#', 'mnuPython', 'mnuRedo', 'mnuDelete', 'mnuForth', 'mnuPrintPreview', 'mnuNewTabGroup', 'mnuPreviousDocument', 'mnuOCL', 'mnuBibTeX', 'mnuOpenCL', 'mnuSQL', 'mnuReplace', 'mnuHighlightMisspelledWords', 'mnu1atxt', 'mnuObjectiveCaml', 'mnuHaskell', 'mnuGDBLog', 'mnuFind', 'mnuC#', 'mnuNextTabGroup', 'mnuOpenGLShadingLanguage', 'mnuRevert', 'mnuYacc', 'mnuFullscreen', 'mnuDocBook', 'mnuTools', 'mnuVerilog', 'mnuCSS', 'mnuFindPrevious', 'mnuPreferences', 'mnuCMake', 'mnuC/C++/ObjCHeader', 'mnuGAP', 'mnuCheckSpelling', 'mnuOthers', 'mnuBennuGD', 'mnuEdit', 'mnuTexinfo', 'mnuXML', 'mnuScientific', 'mnuGo', 'mnuJava', 'mnuAda', 'mnuMovetoNewWindow', 'mnuDocumentStatistics', 'mnuJavaScript', 'mnuPHP', 'mnuHTML', 'mnuContents', 'mnuPerl', 'mnuDocuments', 'mnuVHDL', 'mnuFortran95', 'mnuUndo', 'mnulibtool', 'mnuMarkup', 'mnuPython3', 'mnuPaste', 'mnuSaveAs', 'mnupkg-config', 'mnutxt2tags', 'mnuSetLanguage', 'mnuHelp', 'mnuSidePanel', 'mnuStandardML', 'mnuNemerle', 'mnuErlang', 'mnuMallard', 'mnuSources', 'mnuSearch', 'mnugettexttranslation', 'mnuRuby', 'mnuFindNext', 'mnuNew', 'mnuProtobuf', 'mnuSave', 'mnuFCL', 'mnum4', 'mnuScheme', 'mnu169', 'mnuScilab', 'mnuClose', 'mnuC++', 'mnuOpen', 'mnuProlog', 'mnuNSIS', 'mnuIDL', 'mnuInsertDateandTime', 'mnuXSLT', 'mnuVBNET', 'mnuOOC', 'mnush', 'mnuCUDA', 'mnuGetHelpOnline', 'mnuNextDocument', 'mnuCGShaderLanguage', 'mnuLaTeX', 'mnuMatlab', 'mnuD', 'mnuC', 'mnuLua', 'mnuR']


File 選單下有那些屬性可以用

>>> getobjectinfo('*gedit*', 'mnuFile')
['key_binding', 'label', 'parent', 'key', 'obj_index', 'class', 'children']


看一下 File 選單內有那些 children

>>> getobjectproperty('*gedit*', 'mnuFile', 'children')
'ukn1 mnuNew spr0 spr1 mnuOpen spr2 spr3 spr4 mnuSave mnuSaveAs spr5 spr6 mnuRevert spr7 spr8 spr9 spr10 spr11 mnuPrintPreview mnuPrint spr12 spr13 mnu1atxt spr14 spr15 mnuClose mnuQuit mnuEmpty'


按一下 Open 好了

>>> selectmenuitem('*gedit*', 'mnuFile;mnuOpen')
1


內部實作


呼叫 getwindowlist 時,整個流程由上往下大致上為

  • ldtp
  • pyatspi
  • at-spi2-core

由 ldtp 開始,可以找到它用了 pyatspi 來取得桌面的物件。

import pyatspi
self._desktop = pyatspi.Registry.getDesktop(0)


進入到 pyatspi,它用了 gir 的方法得到 Atspi 物件。至於 Atspi 要怎麼用?這裡附上 API 文件,自行參閱。

@pyatspi/registry.py
from gi.repository import Atspi
return Atspi.get_desktop(i)


另外,這這裡 Atspi 被擴充了一些功能像 __getitem__ 之類的運算,可以參考這個檔案 pyatspi/Accessibility.py 的最後部分。

最後 at-spi2-core 的部分 dbus 的介面使用可以在 at-spi2-core-2.4.2/atspi 裡找到,像是

@atspi/atspi-accessible.c
reply = _atspi_dbus_call_partial (obj, atspi_interface_accessible,
"GetChildAtIndex", error, "i",
child_index);


實際上的實作可以在 registryd 裡找到,如下:

@registryd/registry.c
impl_GetChildAtIndex

2013/08/12

使用 live-build 客製化無人值守 Ubuntu 安裝光碟


要客製化 Ubuntu 安裝光碟,在 Ubutnu wiki 有兩篇教學。1) LiveCDCustomization。2) InstallCDCustomization 。這兩篇文章雖然都很有參考價值,但需要先下載 Ubuntu 的光碟,並以此加工。

小弟早有所聞用 live-build 也可自製開機光碟,google 一下便又找到 Ubuntu 12.04 Cloud LiveLive-build使用指南由於不需先下載光碟,個人偏好使用這種方式,本文也將以此繼續發揮。

Build ISO


不囉嗦,請照下面步驟做:

$ sudo apt-get install live-build livecd-rootfs syslinux-themes-ubuntu-oneiric gfxboot-theme-ubuntu
$ mkdir live-build && cd live-build
$ git clone https://github.com/fcwu/custom-ubuntu-config.git config
$ sudo PROJECT=ubuntu SUITE=precise ARCH=amd64 lb build


約過半小時或好幾個小時,便會生成 binary.iso,此檔便是 Ubuntu 12.04 的安裝光碟。若要改成 13.04 的話,只需將 SUITE=precise 改成 SUITE=raring 即可。

大方向來說,指令可分 3 種, config, clean and build,這些指令若在 auto 資料匣內有相對應的檔案,舉例來說,以我們的平台 lb build 會去執行 auto/build。以下是各指令簡單的介紹:

  • lb config:在當前目錄下建立 config 目錄和相關配置文件
  • lb clean:清空所有做 ISO 時的遺物,其後還可接像 --stage --chroot --bootstrap 這類的參數來指令要清除那部分
  • lb build:按照 config 目錄下的各種配置腳本建構 ISO

無人值守安裝


好加在,Ubiquity (Ubuntu 的安裝程式) 本來就有為了無人值守留後門,Ubiquity 會用 debconf 從 /var/cache/debconf/config.dat 內讀取安裝的設定。要修改這部分可以參考 config/binary_local-includes/preseed/ubuntu.seed 或官方 preseed 文件說明

此外,要讓 Ubiquity 直接跳過那些選項,需在 boot command 加上 automatic-ubiquity。如同 config/binary_local-includes/isolinux/txt.cfg 內的這段

label live-install-auto
menu label ^Install Ubuntu Automatically
kernel /casper/vmlinuz
append file=/cdrom/preseed/ubuntu.seed boot=casper automatic-ubiquity initrd=/casper/initrd.lz quiet splash --


安裝更多軟體


安裝程式可以選擇安裝到 live 系統,或是用 Ubiquity 安裝到硬碟的 install 系統。以下提供 2 種方法。

用 .deb 安裝


這種方法會同時安裝到 live and install 系統。只需將要安裝的 .deb 丟到 config/chroot_packages 即可。但要注意 .deb 相依性的問題。

用 apt-get install 安裝


用 apt-get 的安裝方式,可任選要安裝到 live or install 系統。我們要做的事只需將要安裝的程式列表放到 package-lists 裡即可,如同 config/package-lists/example.chroot.list 所示。

terminator
vim
vim-gtk


若想選擇擇只裝到 live 或 install 系統的話,在命名 *.list 有這些規則

  • *_install.list: 只安裝到 install 系統
  • *_live.list: 只安裝到 live 系統

live-build 內部


live-build 在製作 iso 時,共分 4 大步驟:

  1. bootstrap
  2. chroot
  3. binary
  4. source

更進一步在查看 lb 源碼後,可以發現在執行 lb build 時,會分別做這 4 大步的指令 lb bootstrap, lb chroot, lb binary, lb source。相關源碼在 /usr/share/live/build/scripts/build 裡,如 lb_bootstrap, lb_chroot 這些 scripts。

bootsrap 最主要工作是用 lb bootstrap_debootstrap 建立起最基本的 root filesystem。

chroot 的工作是 chroot 到剛才建立起的 root filesystem,接著按照 config/chroot_*, package-lists and task-lists 的內容將所需修改的部分裝進去。舉例來說 chroot_local-hooks 可以放一些 hook script,chroot_local-includes 拿來放要覆蓋的檔案。

最後,binary 的工作是將 ISO 的 rootfs 和 ISO 產生出來。

source 沒在用,不用提了。

最後的最後,值得一提的是在做完任何一項工作時,.stage/ 資料匣內會產生表示做過的 flag 檔案,若有時只需重做部分工作,可手動將之刪除即可。要不然每次都等個半小時重做 ISO 就太...笨...了


2013/08/01

Debug Xorg with GDB on Ubuntu


在 Ubuntu 上要用 GDB 除錯那些用 apt-get install 安裝的程式十分的容易:1) 安裝 symbols, 2) 打開 GDB。這篇文章以除錯 Xorg 的 evdev 為例,evdev 是 Xorg 的 input driver 之一,它的主要功能是向 Xorg 送出一些鍵盤的按鍵,這篇主要會說明如何用 GDB 在送出 key 之前增加斷點。

實驗環境如下:

  • OS: Ubuntu 12.04 LTS
  • Kernel: 3.2.0-34-generic #53-Ubuntu
  • xserver-xorg-core: 2:1.11.4-0ubuntu10.13
  • xserver-xorg-input-evdev: 1:2.7.0-0ubuntu1.2


前情提要


本來只是除錯 trackpad (觸碰板)的一些行為,這類的工具很多像是

  • xinput
  • xev
  • lsinput
  • input-event
  • evtest

但是準備要用 input-event and evtest,卻發生 Operation not permit,也沒想到要怎麼解只好開始用 GDB。

設定 debug symbol 來源


完全從這裡抄來的, DebuggingProgramCrash,

$ echo "deb http://ddebs.ubuntu.com 1(lsb_release -cs) main restricted universe multiverse"  \
sudo tee -a /etc/apt/sources.list.d/ddebs.list

Stable releases (not alphas and betas) require three more lines adding to the same file, which is done by the following terminal command:

$ echo "deb http://ddebs.ubuntu.com 1(lsb_release -cs)-updates main restricted universe multiverse
deb http://ddebs.ubuntu.com 1(lsb_release -cs)-security main restricted universe multiverse
deb http://ddebs.ubuntu.com 1(lsb_release -cs)-proposed main restricted universe multiverse"  \
sudo tee -a /etc/apt/sources.list.d/ddebs.list
$ sudo apt-key adv --keyserver keyserver.ubuntu.com --recv-keys 428D7C01
$ sudo apt-get update

尋找要安裝的 symbol packages


先用 lsof 找到要除錯的 evdev_drv.so 是那支程式在用:

sudo lsof /usr/lib/xorg/modules/input/evdev_drv.so
lsof: WARNING: can't stat() fuse.gvfs-fuse-daemon file system /home/u/.gvfs
      Output information may be incomplete.
COMMAND  PID USER  FD   TYPE DEVICE SIZE/OFF    NODE NAME
Xorg    1603 root mem    REG    8,3    57000 1572945 /usr/lib/xorg/modules/input/evdev_drv.so

接著再看看是那個 packages 提供:

$ dpkg -S /usr/bin/Xorg
xserver-xorg-core: /usr/bin/Xorg

最後就安裝他們的 dbgsym,順便也把 source code 抓下來:

$ sudo apt-get install xserver-xorg-core-dbgsym xserver-xorg-input-evdev-dbgsym
$ apt-get source xserver-xorg-core xserver-xorg-input-evdev

除錯


由於使用 GDB 除錯 Xorg 會造成整個畫面都暫停,請用 ssh 連到 target 再開啟 GDB。

用 cgdb 指定除錯程式及其 PID。正常載入 symbols 應該會有 reading symbols ... done 那行。

$ sudo cgdb -- /usr/bin/Xorg `pidof X`
Reading symbols from /usr/lib/xorg/modules/input/evdev_drv.so...Reading symbols from /usr/lib/debug/usr/lib/xorg/modules/input/evdev_drv.so...done.

設定源碼路徑

(gdb) directory xserver-xorg-input-evdev-2.7.0/src
Source directories searched: /home/u/xorg/xserver-xorg-input-evdev-2.7.0/src:1cdir:1cwd

以 cgdb 為例,設完中斷點如下,如上圖:

(gdb)
Breakpoint 1 at 0x7fb2407a9959: file ../../src/evdev.c, line 360.

針對這個中斷點設定一些 messages,再使其繼續執行。

(gdb) commands 1
Type commands for breakpoint(s) 1, one per line.
End with a line saying just "end".
>printf "0x%X, 0x%X", code, value
>c
>end
(gdb) c

接著在測試主機上按 asd,就會有如下訊息丟出來。它輸出 2 個數字,第一個是 kernel 回報的 event code,第二個數字應該是 key press/release。

Continuing.

Breakpoint 1, EvdevQueueKbdEvent (pInfo=0x7fb2477a0010, ev=0x7fffc5cd0548, value=1) at ../../src/evdev.c:360
0x26, 0x1
Breakpoint 1, EvdevQueueKbdEvent (pInfo=0x7fb2477a0010, ev=0x7fffc5cd0548, value=0) at ../../src/evdev.c:360
0x26, 0x0
Breakpoint 1, EvdevQueueKbdEvent (pInfo=0x7fb2477a0010, ev=0x7fffc5cd0548, value=1) at ../../src/evdev.c:360
0x27, 0x1
Breakpoint 1, EvdevQueueKbdEvent (pInfo=0x7fb2477a0010, ev=0x7fffc5cd0548, value=0) at ../../src/evdev.c:360
0x27, 0x0
Breakpoint 1, EvdevQueueKbdEvent (pInfo=0x7fb2477a0010, ev=0x7fffc5cd0548, value=1) at ../../src/evdev.c:360
0x28, 0x1
Breakpoint 1, EvdevQueueKbdEvent (pInfo=0x7fb2477a0010, ev=0x7fffc5cd0548, value=0) at ../../src/evdev.c:360
0x28, 0x0

其中,回報的 event code 可以用 xmodmap 看到列表:

$ xmodmap -pke  grep -A 3 ' 38 ='
No protocol specified
keycode  38 = a A a A
keycode  39 = s S s S
keycode  40 = d D d D
keycode  41 = f F f F

evtest 也可以,但是要 +8

$ sudo evtest /dev/input/event2
Input driver version is 1.0.1
Input device ID: bus 0x3 vendor 0x4ca product 0x4b version 0x110
Input device name: "Lite-On Technology Corp. USB Keyboard"
Supported events:
  Event type 0 (EV_SYN)
  Event type 1 (EV_KEY)
    Event code 1 (KEY_ESC)
    Event code 2 (KEY_1)
    Event code 3 (KEY_2)
    Event code 4 (KEY_3)
    Event code 5 (KEY_4)
    Event code 6 (KEY_5)
    Event code 7 (KEY_6)
    Event code 8 (KEY_7)
    Event code 9 (KEY_8)
    Event code 10 (KEY_9)
    Event code 11 (KEY_0)
    Event code 12 (KEY_MINUS)
    Event code 13 (KEY_EQUAL)
    Event code 14 (KEY_BACKSPACE)
    Event code 15 (KEY_TAB)
    Event code 16 (KEY_Q)
    Event code 17 (KEY_W)
    Event code 18 (KEY_E)
    Event code 19 (KEY_R)
    Event code 20 (KEY_T)
    Event code 21 (KEY_Y)
    Event code 22 (KEY_U)
    Event code 23 (KEY_I)
    Event code 24 (KEY_O)
    Event code 25 (KEY_P)
    Event code 26 (KEY_LEFTBRACE)
    Event code 27 (KEY_RIGHTBRACE)
    Event code 28 (KEY_ENTER)
    Event code 29 (KEY_LEFTCTRL)
    Event code 30 (KEY_A)

vim gdb plugin - pyclewn and dbgsym


(8/5 update)

習慣用 debug 可以用 pyclewn 當作介面,參考我之前介紹的文章

若是需要自己編譯的 deb 也有 dbgysm 的話由這篇文章提到,可以 1) 安裝 pkg-create-dbgsym 或 2)修改 debian/rules。

2013/07/21

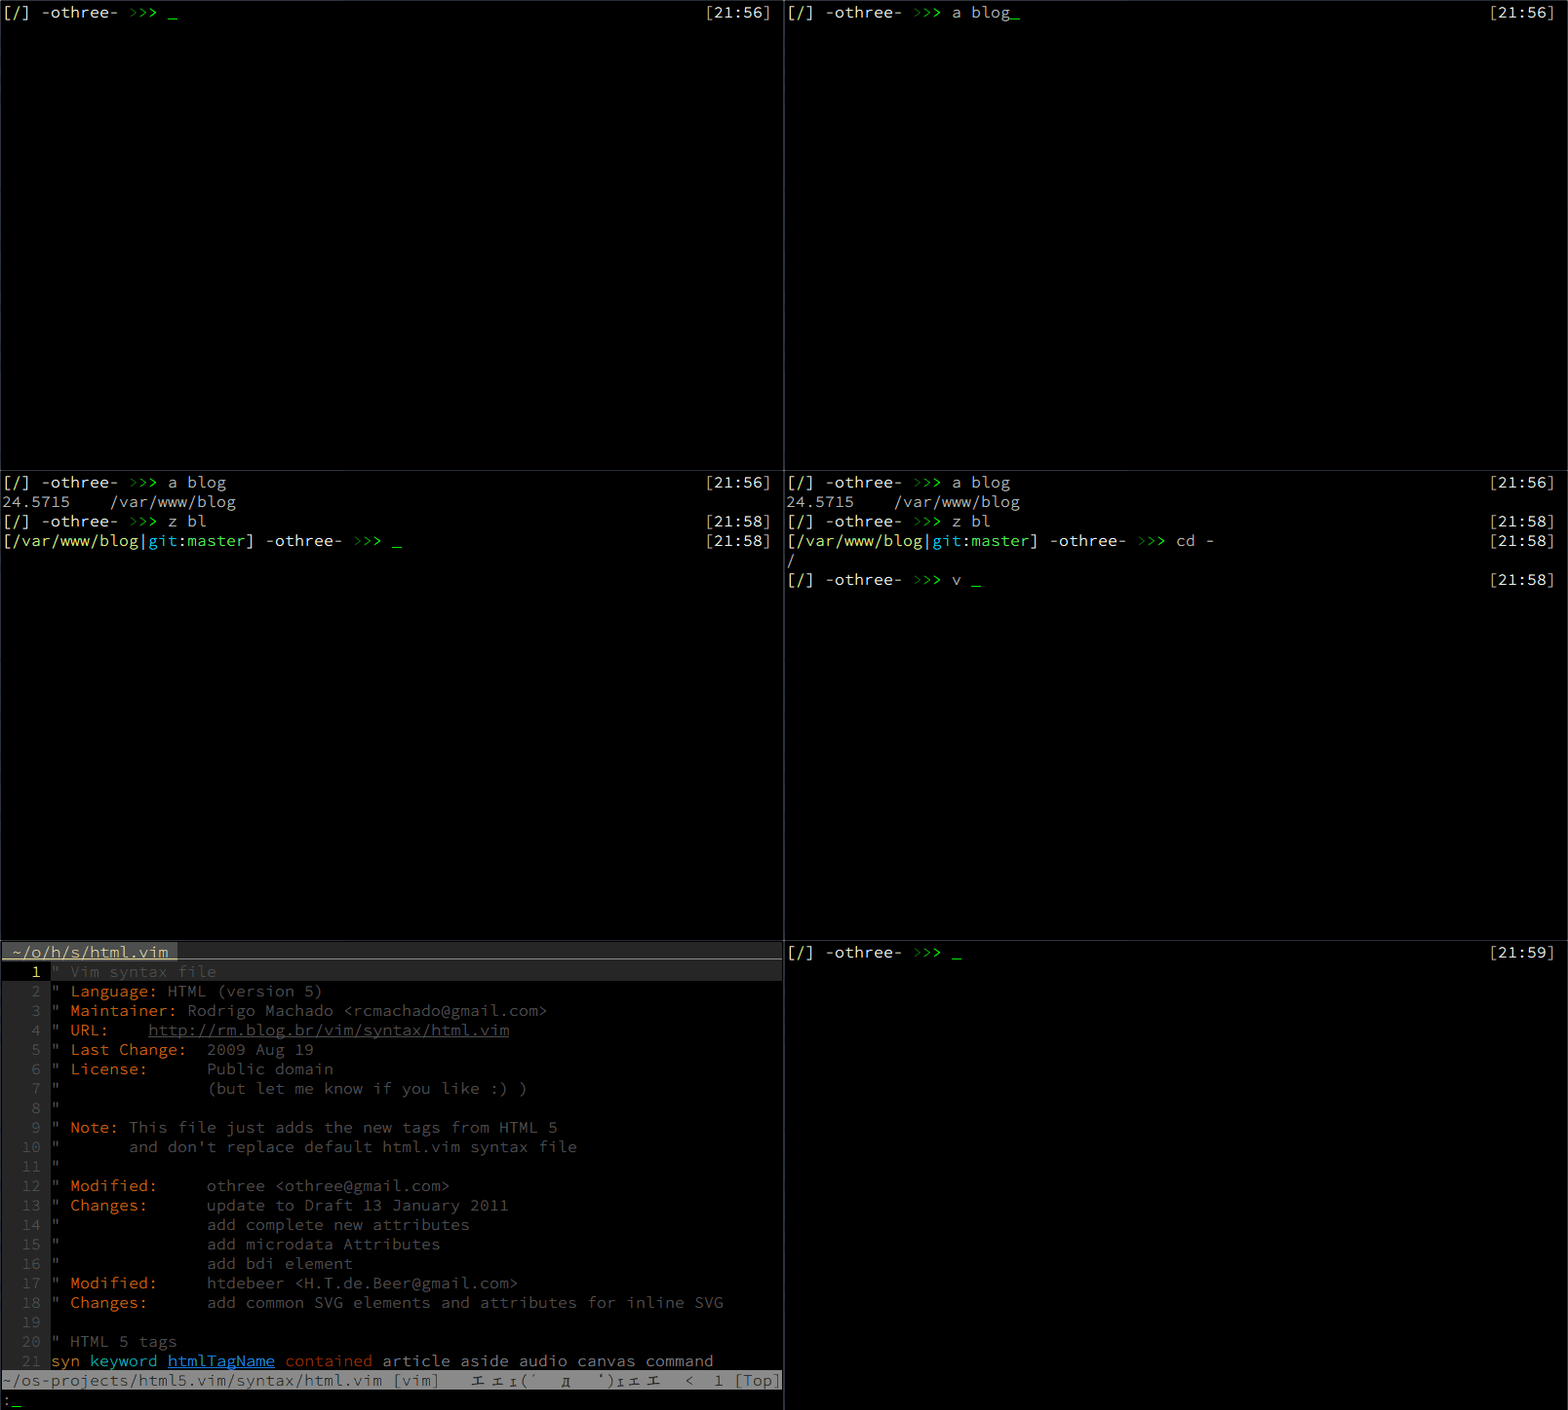
fasd on Ubuntu - 命令列加速工具


(圖片來自 o3noblog)

之前 othree 大大推薦的 fasd 可在 PPA 上下載了。

$ sudo add-apt-repository ppa:fcwu-tw/ppa
$ sudo apt-get update
$ sudo apt-get install fasd

使用 bash 的朋友們,可在 .bashrc 加入

eval "$(fasd --init auto)"

可用的命令有

alias a='fasd -a'        # any
alias s='fasd -si'       # show / search / select
alias d='fasd -d'        # directory
alias f='fasd -f'        # file
alias sd='fasd -sid'     # interactive directory selection
alias sf='fasd -sif'     # interactive file selection
alias z='fasd_cd -d'     # cd, same functionality as j in autojump
alias zz='fasd_cd -d -i' # cd with interactive selection

真是好記又好用 :)

2013/07/17

Linux Firmware Debug Kit on Ubuntu


跟我一樣有點年紀,或是曾經做過 BIOS 相關工作的朋友們,一定有聽過 merck 的 LFDK。沒有聽過 LFDK,至少也有聽過 RU 吧,但 RU 是在 DOS 執行的工具,LFDK 則是相似的 Linux 工具。目前 LFDK 能查看 PCI register,IO and memory space。

小 弟將它重新包裝並做些修改後放到人 PPA 上,可以使用以下指令安裝:

$ sudo add-apt-repository ppa:fcwu-tw/ppa
$ sudo apt-get update
$ sudo apt-get install lfdk

執行

$ sudo lfdk

程式完全用 github 托管,希望有心人能再豐富 lfdk 的功能。

2013/06/27

Linux Power and Battery Life


這篇文章整理之前在看 Ubuntu 省電機制的。


電池資訊


Linux 系統中的電池資訊在 sysfs 裡都找得到,如下。或是直接使用 gnome-power-statistics 來看也可以,如上圖。

u-Latitude-E6440:/sys/class/power_supply/BAT01 ls
alarm               current_now   model_name     status      uevent
charge_full         cycle_count   power          subsystem   voltage_min_design
charge_full_design  device        present        technology  voltage_now
charge_now          manufacturer  serial_number  type

對 voltage_now, current_now, charge_full, voltage_min_design 做簡單的運算便能得到放電速度及總電量。底下的 script 提供了簡單的放電速度統計。


執行畫面如下:

u@u-Latitude-E6540:~1 ./power.sh  ts
Jun 13 16:20:43 current   average   capacity   full_capacity   time_left
Jun 13 16:20:43 14.13254   14.13254   37.19610   65.49000   2.63
Jun 13 16:20:48 14.07107   14.11409   37.17390   65.49000   2.63
Jun 13 16:20:53 14.08747   14.10610   37.15170   65.49000   2.63
Jun 13 16:20:58 13.77746   14.00750   37.14060   65.49000   2.65
Jun 13 16:21:03 14.03222   14.01491   37.11840   65.49000   2.64
Jun 13 16:21:08 13.16450   13.75978   37.09620   65.49000   2.69

有時沒儀器可以量時,用 script 來計算是蠻方便的。


延長電池使用時間


之前用了 2 種方式來讓系統更省電。

  1. Append boot coomand "pcie_aspm=force"
  2. Install PowerTOP
  3. Install Laptop Mode Tools

第一種 ASPM 的方法,大概可以省個 2 W 左右。第二種 PowerTOP 的方式,全部省電機制啟用,也可再省個 2 W 左右。最後第三種 laptop-mode-tools,這只是個方便的 PowerTOP 工具而已,它會讓你在沒插 AC 電源時,自動將 PowerTOP 的省電機制啟用。個人是建議一般的 NB 可以試試 1 + 3。

最近做到的平台都是 SharkBay (haswell),對於硬體比較有針對省電設計的,大概上面那些機制全下,大概平均耗電量是 6 W/h,對於常見的 50 W 的電池用個 8 小時是沒問題,但 8 小時也是要 NB 放著都不動,如果像我常看個影片,開個 VM,那還會有 5 小時嗎?呵呵

(對於 MBA 的 12 小時來說,8 小時跟垃圾一樣)

2013/06/17

GTK 3 and CSS in Python


最近在看 CSS 對於 GTK 3 程式的支援,並且寫了一些小程式玩了一下,覺得相當愉悅。

在 GTK 2 以前,要修改 widget 外觀要可以透過 gtkrc,但對於 GTK 3 可以直接給 CSS 相較之下,修改 CSS 簡單多了。此外 CSS 又提供像是背景的 gradient, transition, border-radius, border-image 這類的特性,要做到一些簡單的特效也變得十分容易。詳細的特效可參考 GtkCssProvider

想直接玩一下 CSS 的花樣可直接在 Ubuntu 13.04 下安裝 gtk-3-examples,並執行 gtk3-demo

$ sudo apt-get install gtk-3-examples
$ gtk3-demo

其中 css theming 的部分就可看到 CSS 帶來的特殊處。如同下面影片:


Hello World


接下來就來寫個簡單的 GKT 3 and CSS 的“你好世界”吧!在 Ubuntu 13.04 的環境下需安裝:

$ sudo apt-get install gir1.2-gtk-3.0 

程式如下,執行畫面類似 demo 裡的 CSS accordion。


Document


若是第一次使用 GTK 3 的朋友們可以先從這份 GTK 3 tutorial 開始看起。若是已經熟悉 GTK 開發的朋友,可接接產生 API reference 來看,產生方式如下:

$ sudo apt-get install yelp yelp-tools libgirepository1.0-dev libgtk-3-dev
$ g-ir-doc-tool --language Python -o ./output_dir /usr/share/gir-1.0/Gtk-3.0.gir
$ yelp ./output_dir/index.page

執行畫面如下:

2013/06/13

clutter-gtk 現況與發展


最近在嘗試如何用 GTK+ 做到視窗元件的動畫。

說到 GTK+ 一開始一定去查查 cairo 有沒有好用的 API,後來查到了這篇,稍微看了一下只覺得是杯具。我的需求只是針對 GTK+ 元件,在 mouseover 時,做個 scale,transparent(alpha), translate 這類常見的特效,但那篇文章裡一看到還要實作 timer function,就沒力了。

接著又想到 clutter 可以用,就開始用 clutter-gtk 埋頭幹起,搞了一整天結果像這樣:


程式可在這裡找到。

但過沒多久,看到一則訊息,說 clutter-gtk 只是實驗性質的東西,未來不會再使用。做了好幾天的白工,杯具呀...

那到底該怎麼做視窗元件的動畫呢?可以試試 GtkCssProvider

2013/06/06

製作多重 Ubuntu 開機 USB


感謝 4元 提供的這篇文章,裡頭描述了如何在同一支隨身碟放不同 Ubuntu 的版本來開機。可是因為小弟需要拿來開機的 ISO 除了眾多的 Ubuntu/Debian 外,還有很多 Ubuntu 系列的 ODM ISO,因此很需要一個 script 來幫我自動產生 grub.cfg。


準備工作


如果你的隨身碟超過 4G,請先分割它吧。舉例來說,小弟是用 16G 的隨身碟,分成了 2G 放 Ubuntu,14G 放 iso。如下

$ sudo fdisk -l /dev/sdc

Disk /dev/sdc: 16.7 GB, 16684941312 bytes
64 heads, 32 sectors/track, 15912 cylinders, total 32587776 sectors
Units = sectors of 1 * 512 = 512 bytes
Sector size (logical/physical): 512 bytes / 512 bytes
I/O size (minimum/optimal): 512 bytes / 512 bytes
Disk identifier: 0x8612adfe

   Device Boot      Start         End      Blocks   Id  System
/dev/sdc1            2048     4196351     2097152   83  Linux
/dev/sdc2         4196352    32587775    14195712   83  Linux

接著

  • 格式化硬碟
  • 建立 Ubuntu 開機光碟
  • 安裝 grub 工具

我的測試環境是 Ubuntu 12.04.2,最後一行安裝 grub 的部分可能會有點不同喔

$ sudo mkfs.vfat /dev/sdc1
$ sudo mkfs.ext2 /dev/sdc2
$ usb-creator-gtk -n -i ubuntu-13.04-desktop-amd64.iso
$ sudo apt-get install grub-pc-bin grub-efi-amd64-bin
$ sudo grub-install --root-directory=/media/97C4-B559/ /dev/sdc


制作 grub.cfg


先準備一些 iso 複制到第 2 個 partitions

$ ls ubuntu-*
ubuntu-12.04.2-desktop-amd64.iso  ubuntu-12.10-desktop-amd64.iso
ubuntu-12.04-server-amd64.iso     ubuntu-13.04-desktop-amd64.iso
$ cp ubuntu-1* /media/e39b1707-7f5c-4d0d-a019-13cdfd86b20d/

把 script 抓下來,執行它,第一個參數是放 iso 的位置,第二個參數是放 grub.cfg 路徑

$ cd /media/e39b1707-7f5c-4d0d-a019-13cdfd86b20d/
$ wget https://raw.github.com/fcwu/sys_prog/master/mkgrub.sh
$ chmod +x mkgrub.sh
$ sudo ./mkgrub.sh ./ ../97C4-B559/boot/grub/grub.cfg
Creating grub.cfg template
Scanning ./
    creating boot entry for file .//ubuntu-12.04.2-desktop-amd64.iso...ok
    creating boot entry for file .//ubuntu-12.04-server-amd64.iso...ok
    creating boot entry for file .//ubuntu-12.10-desktop-amd64.iso...ok
    creating boot entry for file .//ubuntu-13.04-desktop-amd64.iso...ok

完成。請拿著 USB 去開機看看吧,結果如上圖。

2013/06/05

PxeUbuntu: Install Ubuntu from network


現在整天都在安裝各式各樣的 Ubuntu,目前安裝的方式都是用 usb-creator-gtk 把 iso 放到隨身碟再從 USB 開機,過程花很多時間在製作隨身碟。網路上可以找到很多直接從網路開機,安裝 Ubuntu 的方式,只是那要安裝 NFS, DHCP, tftp server,還要設定一堆有的沒的,很麻煩。這次要介紹的 pxeubuntu 可以讓你免除那些煩惱。


Install PxeUbuntu


$ sudo add-apt-repository ppa:fcwu-tw/ppa
$ sudo apt-get update
$ sudo apt-get install pxeubuntu


Run


請先確定

  • 沒有裝 dhcp server,有裝的話建議先註解掉目前的設定,讓程式自動設定。
  • 已設定固定 IP

執行

$ sudo pxeubuntu start
2013-06-05 05:40:41,895 INFO     args: work_dir: /home/u
2013-06-05 05:40:41,895 INFO     args: iso_dir: /home/u/iso
2013-06-05 05:40:41,895 INFO     args: nfs_dir: /home/u/exportfs
2013-06-05 05:40:41,895 INFO     args: tftp_dir: /var/lib/tftpboot
Add PXE boot configure to dhcpd.conf? (Y/N) y
2013-06-05 05:40:43,052 INFO     check ISOs - TD(TFTP DIR) TB(TFTP BOOT) M(MOUNT) MP(MOUNT POINT) E(EXPORTS)
2013-06-05 05:40:43,060 INFO     Start monitoring file in /home/u/iso

在第一次使用,且沒有 dhcp 的設定時,它會問是否要加入 dhcp 設定,回答 y 就沒錯了。

有問題的話請也先確定有沒有手動把 NFS, DHCP TFTP server 給關掉。


加入/刪除 ISO


將你的 ISO 放到 ~/iso/ 即會自動建立 boot entry 及所有設定。移除檔案時相關設定也會被移掉。

$ # Add boot entry
$ sudo mv ubuntu.iso ~/iso
$ # remove boot entry
$ sudo mv ~/iso/ubuntu.iso ~/

有 boot entry 被修改時,在執行 pxeubuntu 的視窗會顯示這些 log

2013-06-05 05:45:22,801 INFO     Inert image ubuntu-13.04-desktop-amd64 in path /home/u/iso/ubuntu-13.04-desktop-amd64.iso.
2013-06-05 05:45:22,856 INFO     Insert successfully
2013-06-05 05:45:38,640 INFO     FILE MOVE FROM: /home/u/iso/ubuntu-13.04-desktop-amd64.iso
2013-06-05 05:45:38,640 INFO     FILE DELETE: /home/u/iso/ubuntu-13.04-desktop-amd64.iso
2013-06-05 05:45:38,640 INFO     Remove image ubuntu-13.04-desktop-amd64 in path /home/u/iso/ubuntu-13.04-desktop-amd64.iso
2013-06-05 05:45:38,681 INFO     Remove successfully

開機測試


將測試機台跟執行 pxeubuntu 的伺服器用網路線接著,再從開機選項裡選網路開機,便會看到上圖了。

以上,夠簡單吧!


其它指令


$ sudo pxeubuntu -h
usage: pxeubuntu [-h] [--log-level {notset,debug,info,warning,error,critical}]
                 [--log-dir LOG_DIR] [--work-dir WORK_DIR] [--iso-dir ISO_DIR]
                 [--nfs-dir NFS_DIR] [--tftp-dir TFTP_DIR] [-d] [-i INTERFACE]
                 {start,stop,restart,insert,remove,check,insert_copy,version}

A PXE boot assistant service

positional arguments:
  {start,stop,restart,insert,remove,check,insert_copy,version}
                        Action is one of start, stop, restart, insert, remove,
                        check, insert_copy, version

optional arguments:
  -h, --help            show this help message and exit
  --log-level {notset,debug,info,warning,error,critical}
                        Log level. One of notset, debug, info, warning, error
                        or critical (info by default)
  --log-dir LOG_DIR     Path to the directory to store log files
  --work-dir WORK_DIR   Path to the working directory. $HOME directory is
                        default. Some directories refer this option as base
                        folder, such as iso, nfs mount point, tftp
  --iso-dir ISO_DIR     Directory to put iso files
  --nfs-dir NFS_DIR     Directory to mount iso files
  --tftp-dir TFTP_DIR   Directory to tftp root
  -d, --daemon          Run as daemon
  -i INTERFACE, --interface INTERFACE
                        network interface such as eth0, wlan0 for DHCP and NFS
                        binding

2013/06/03

Kernel Module Insert Failure: disagrees about version of symbol module_layout, Unknown symbol __fentry__ and __stack_chk_fail


由於沒有我家那台 NAS 的 kernel 的 source code 及 config 所以在編一些 kernel module 時發生了一堆問題,這篇文章整理了發生的問題。

在開始之前,我要大力抨擊我用的這家 NAS 公司,請他們儘快將 kernel source code 公佈及把 /proc/config.gz 打開,這不只是為 GPL 的問題,也是對我們這些玩家的友善表現。

Q1: disagrees about version of symbol module_layout


喔,版本不合,先看一下自己編出來 module version

$ modprobe --dump-modversions ./vboxguest.ko | grep module_layout
0x8495e121 module_layout

隨便找個 "they" module 來參考

$ modprobe --dump-modversion /lib/modules/3.1.2/ath.ko | grep module_layout
0x2b701e76 module_layout

至此,大概就知道要把 module_layout 的版本改成 0x2b701e76。推薦使用 hte 這套軟體,Ubuntu 就 apt-get install ht。hte 怎麼用?先用它找到 ELF section __versions 的 offset,之後再直接 goto 到那個位置,最後修改結果如下:

$ readelf -x __versions vboxguest.ko 

Hex dump of section '__versions':
0x00000000 21e19584 00000000 6d6f6475 6c655f6c !.......module_l
0x00000010 61796f75 74000000 00000000 00000000 ayout...........
0x00000020 00000000 00000000 00000000 00000000 ................
0x00000030 00000000 00000000 00000000 00000000 ................

題外話,module 在編譯時除了放 version 外,還有 info,它就放在 .modinfo section。

$ modinfo ./vboxguest.ko 
filename:       ./vboxguest.ko
version:        4.1.12_Ubuntu
license:        GPL
description:    Oracle VM VirtualBox Guest Additions for Linux Module
author:         Oracle Corporation
srcversion:     9E8128FBCF872CA4EA6525A
alias:          pci:v000080EEd0000CAFEsv00000000sd00000000bc*sc*i*
depends:        
vermagic:       3.2.0-41-generic SMP mod_unload modversions 

$ readelf -x .modinfo vboxguest.ko 

Hex dump of section '.modinfo':
0x00000000 76657273 696f6e3d 342e312e 31325f55 version=4.1.12_U
0x00000010 62756e74 75006c69 63656e73 653d4750 buntu.license=GP
0x00000020 4c006465 73637269 7074696f 6e3d4f72 L.description=Or
0x00000030 61636c65 20564d20 56697274 75616c42 acle VM VirtualB
0x00000040 6f782047 75657374 20416464 6974696f ox Guest Additio
0x00000050 6e732066 6f72204c 696e7578 204d6f64 ns for Linux Mod
0x00000060 756c6500 61757468 6f723d4f 7261636c ule.author=Oracl
0x00000070 6520436f 72706f72 6174696f 6e007372 e Corporation.sr
0x00000080 63766572 73696f6e 3d394538 31323846 cversion=9E8128F
0x00000090 42434638 37324341 34454136 35323541 BCF872CA4EA6525A
0x000000a0 00616c69 61733d70 63693a76 30303030 .alias=pci:v0000
0x000000b0 38304545 64303030 30434146 45737630 80EEd0000CAFEsv0
0x000000c0 30303030 30303073 64303030 30303030 0000000sd0000000
0x000000d0 3062632a 73632a69 2a006465 70656e64 0bc*sc*i*.depend
0x000000e0 733d0076 65726d61 6769633d 332e322e s=.vermagic=3.2.
0x000000f0 302d3431 2d67656e 65726963 20534d50 0-41-generic SMP
0x00000100 206d6f64 5f756e6c 6f616420 6d6f6476  mod_unload modv
0x00000110 65727369 6f6e7320 00                ersions .


Q2: Unknown symbol __fentry__ (err 0)


錯誤訊息

[13101.595874] xxxxx: Unknown symbol __fentry__ (err 0)

Unknown symbol 的問題,我在前幾篇文章有提到解法,但是 __fentry__ 卻在 /proc/kallsyms 裡找不到。

這個追一下 kernel source code 可以發現跟 ktrace 有關,把 kernel config CONFIG_KTRACE 關掉即可。


Q3: Unknown symbol __stack_chk_fail (err 0)


錯誤訊息

[13102.472194] xxxxx: Unknown symbol __stack_chk_fail (err 0)

這個問題有玩 stack overflow 過的來都會很熟悉,這個編 module 時加個 CFLAGS += -fno-stack-protector 就行。估計是廠商為了 downsize kernel 所以關了一堆東西。

Reference

  • 解析 Linux 內核可裝載模塊的版本檢查機制, http://www.ibm.com/developerworks/cn/linux/l-cn-kernelmodules/
  • 有人遇到过 Unknown symbol __stack_chk_fail 这样的问题么, http://bbs.chinaunix.net/thread-2049091-1-1.html
  • 模塊不能插入的問題解決 disagrees about version of symbol struct_module, http://lagignition.blog.163.com/blog/static/12873002320109135292479/

(真是一個失敗的標題)

2013/05/29

Debugging ASL with jprobe


前幾篇文章有提到用 systemtap 來監視 ASL 呼叫的順序,但使用 systemtap 有幾個缺點:

  1. 要抓近 700 MB 的 debug symbols
  2. 要在裡頭加入自己的 c code 很麻煩

也因此小弟改用了 jprobe 來實作這個部分,並且加入了 ASL 整數參數的列印。以下是使用方式:

先抓 jprobe 程式,其中在 jprobes 資料匣中有個 acpica 資料匣,那是直接從 kernel source code drivers/acpi/acpica 中複製下來,我這裡是用 3.5.0-22,這裡可能會需要各位抓自己對應的 kernel 版本來用。

$ git clone https://github.com/fcwu/sys_prog.git
$ cd sys_prog/jprobes
$ make -C /lib/modules/`uname -r`/build M=`pwd`

插入模組,再清空 dmesg 訊息。

$ sudo insmod jprobe1.ko
$ sudo dmesg -c

最後按下會發出 Q event 的 hotkey,再執行 dmesg 就可以看到輸出結果如下:

[ 9113.652829] ASLP:_L13 >
[ 9113.652956] ASLP:_L13 <
[ 9113.652985] ASLP:_Q66 >
[ 9113.653043] ASLP:..NEVT >
[ 9113.653059] ASLP:....ECG1 >
[ 9113.653075] ASLP:......ECRW >
[ 9113.653081] ASLP:......  Op0: Integer 0000000000000007
[ 9113.653097] ASLP:........ECR2 >
[ 9113.653102] ASLP:........  Op0: Integer 0000000000000007
[ 9113.653115] ASLP:..........ECR1 >
[ 9113.653120] ASLP:..........  Op0: Integer 0000000000000007
[ 9113.653739] ASLP:..........ECR1 <
[ 9113.653773] ASLP:..........ECR1 >
[ 9113.653780] ASLP:..........  Op0: Integer 0000000000000008
[ 9113.654973] ASLP:..........ECR1 <
[ 9113.655005] ASLP:........ECR2 <
[ 9113.655016] ASLP:......ECRW <
[ 9113.655024] ASLP:....ECG1 <

ASL 真是愈來愈好追了。

2013/05/27

[vim] YouCompleteMe


最近因為密集的在 Ubuntu 上追 code,卻發現原本在 mac 的上可以用的 YouCompleteMe plugin,在 Ubuntu 卻因 vim 版本太舊不能用。於是小弟將 vim_7.3.923 放在了 PPA 上,若有剛好使用 vim 及 Ubuntu 的朋友們可以直接這樣安裝:

$ sudo add-apt-repository ppa:fcwu-tw/ppa
$ sudo apt-get update
$ sudo apt-get install vim

(只放了 12.04 and 13.04 這 2 個版本而已,13.10 已經是 7.4 不需更新) (放東西到 PPA 都要等個 20 小時才會幫我編,LP 真是杯具)

接著開始來安裝 YouCompleteMe,假設 vim plugins 是用 vundle 管理:

$ sudo apt-get install build-essential cmake python-dev
$ cd ~/.vim/bundle
$ git clone https://github.com/Valloric/YouCompleteMe
$ cd ~/.vim/bundle/YouCompleteMe
$ ./install.sh --clang-completer
$ # Then, add Bundle 'YouCompleteMe' to your .vimrc

最後,為什麼要用 YouCompleteMe 呢?請配上圖及以下解釋:

  • 不用按任何 tab 來啟用自動補齊
  • 它是使用 fuzzy 方式來當關鍵字,換句話說若是打 dir,可能出來的候選會有 dirxxx, xxxdir, xxxdirxxx,行為就像是其它 vim plugins Ctrl-T or FuzzyFinder
  • 它提供語意上的補齊(semantic completions),像在 python 裡打上 os. 它會幫你找出 os 這個 module 底下的所有 functions, modules 等

後記。在這次編 13.04 的 vim 時遇到 python configuration path 由原本 12.04 的 /usr/lib/python2.7/config 搬到 /usr/lib/python2.7/config-x86_64-linux/gnu,導致 vim configuration 有些地方要稍做修改...

2013/05/23

Linux Insert Module Error: Unknown symbol xxxxxxx


前幾天在幫 NAS 灌上 Virtualbox 時編譯 kernel module(DKMS) 時出錯,後來手動編譯,卻在 insmod 時 出現錯誤,dmesg 也出現下面這樣的錯誤訊息:

$ insmod vboxdrv/vboxdrv.ko
insmod: error inserting 'vboxdrv/vboxdrv.ko': -1 Invalid parameters
$ dmesg | tail
[84167.691738] vboxdrv: disagrees about version of symbol sched_setscheduler
[84167.698665] vboxdrv: Unknown symbol sched_setscheduler (err -22)
[84167.704799] vboxdrv: disagrees about version of symbol wake_up_process
[84167.711336] vboxdrv: Unknown symbol wake_up_process (err -22)
[84167.717174] vboxdrv: disagrees about version of symbol __free_pages
[84167.723506] vboxdrv: Unknown symbol __free_pages (err -22)

會出現這樣的錯誤,大概是因為我沒有原本 NAS 的 kernel source code and config,所以只能用 uname -r 找到一個差不多的版本,再參考其 header 編譯造成。但是該如何解這樣的問題呢?

首先確定每個 unknown symbol 的位址,以 sched_setscheduler 為例:

$ grep 'T sched_setscheduler$' /proc/kallsyms
ffffffff8105c250 T sched_setscheduler

接著準備 symbol address map,如下:

$ tee addrs.dat <%lt;EOF
SECTIONS
{
sched_setscheduler = 0xffffffff8105c250;
wake_up_process = 0xffffffff8105a400;
__free_pages = 0xffffffff81111de0;
}
EOF

這個格式應該很容易懂,大概就是 <unknown symbol> = <address> 這樣的格式。最後重新 link ko 用以下指令:

$ ld -r -o vboxdrv/vboxdrv-1.ko vboxdrv/vboxdrv.ko -R addrs.dat

打完收工。

2013/05/21

Debug ACPI in Ubuntu


做為一位 Ubuntu on x86 的軟體工程師,一定都會碰到 ACPI 相關問題(是嗎?),這次就來談談 ACPI 的除錯方法。本文的測試環境為 Ubuntu 12.04 kernel 3.5.0-22。


匯出 ACPI tables


除錯的第一步,可以先看看 ACPI tables 有沒有正確被寫進 100000h 以下的位置,方法百百種,推薦用

$ sudo fwts acpidump -
$ # acpidump 是另一個工具,如果需要對照 hex 輸出可選用它
$ # sudo acpidump > acpidump.dat

匯出的結果大概如這般

Dump ACPI tables.
----------------------------------------------------------------------------------------------------
Test 1 of 1: Dump ACPI tables.
RSDP @ f0490 (36 bytes)
---------------
[0x000 0000   8]                                Signature: RSD PTR
[0x008 0008   1]                                 Checksum: 0x51
[0x009 0009   6]                                   OEM ID: DELL
[0x00f 0015   1]                                 Revision: 0x02
[0x010 0016   4]                              RsdtAddress: 0xd6ff3028
[0x014 0020   4]                                   Length: 0x00000024
[0x018 0024   8]                              XsdtAddress: 0x00000000d6ff3080
[0x020 0032   1]                        Extended Checksum: 0x57
[0x021 0033   3]                                 Reserved: 0x00 [0]
[0x021 0033   3]                                 Reserved: 0x00 [1]
[0x021 0033   3]                                 Reserved: 0x00 [2]

通常比較有參考價值的是 FACP,像是 SMI command port, ACPI enable/disable value, PM block and GPE block 等等。相關資料也可在 ACPI spec 4.8 ACPI Register Model 裡找到。

另外,DSDT and SSDT(s) 這 2 類 table 由於放了 AML 紀錄,像是熱插拔,Q, L, E event 的實作,也常會需要拿來除錯,並且多半有問題的都是 DSDT。這些 tables 可以用下面方法匯出:

$ sudo cp /sys/firmware/acpi/tables/DSDT ./ && sudo chown doro DSDT
$ sudo cp /sys/firmware/acpi/tables/SSDT ./ && sudo chown doro SSDT*
$ # 若是剛才有用 acpidump,這裡可用
$ # acpixtract -sSSDT acpidump.dat
$ # acpixtract -sDSDT acpidump.dat

接著,再把那些 AML 反組譯成 ASL,如下:

$ iasl -d DSDT.dat SSDT*.dat

結果變存成 DSDT.dsl and SSDT*.dsl。得到 ASL 後,痛苦的除錯便開始了。


追蹤 ASL(DSDT)


一般來說,若只是要追 ACPI events 有沒有被呼叫,可以先用 acpi_listen 來做初步的確認,如下:

$ sudo acpi_listen
video LCD 00000087 00000000
video LCD 00000086 00000000

看來 LCD 亮度調整的 event 有送出,非常好。如是沒有只好再進入下一步:追 ASL。

目前小弟知道有 2 種可以追蹤 ASL 的方法,第一種是重編 kernel 把 CONFIG_ACPI_DEBUG 設成 y,如此便能用 /sys/module/acpi/parameters/debug_{layer,level} 來追流程。這種方法可以參考 ACPI Tricks and Tips 這份文件的方法。雖然這種方法確實不錯用,可惜小弟上次除錯遇到了極端的例子,問題一重編 kernel 就不見了,於是只好用第二種 systemtap 的方法。

首先,先安裝 kernel debug symbols

$ sudo tee /etc/apt/sources.list.d/ddebs.list << EOF
deb http://ddebs.ubuntu.com/ precise          main restricted universe multiverse
deb http://ddebs.ubuntu.com/ precise-security main restricted universe multiverse
deb http://ddebs.ubuntu.com/ precise-updates  main restricted universe multiverse
deb http://ddebs.ubuntu.com/ precise-proposed main restricted universe multiverse
EOF
$ sudo apt-key adv --keyserver keyserver.ubuntu.com --recv-keys ECDCAD72428D7C01
$ sudo apt-get update
$ sudo apt-get install linux-image-$(uname -r)-dbgsym

接著應該再 sudo apt-get install systemtap 即可,但小弟又遇到 Ubuntu 12.04 的 systemtap 版本太舊的問題,於是只好抓 12.10 的 package 來用,這裡會用到有:

  1. systemtap, http://packages.ubuntu.com/quantal/systemtap
  2. systemtap-common, http://packages.ubuntu.com/quantal/systemtap-common
  3. systemtap-runtime, http://packages.ubuntu.com/quantal/systemtap-runtime

這些抓下來後 sudo dpkg -i *.deb 即安裝成功。接下來請再下載 systemtap script aml.stp,最後我們便能用 sudo stap -g aml.stp 追蹤所有 ASL 的 operations,一開始除錯時通常會配合著 grep Evaluate and Call 先對整個 method 呼叫流程有初步認識,如下:

$ sudo stap -g aml.stp | ts | tee acpi_ok.log | grep '\(Evalua\|Call\)'
May 21 09:47:13 Evaluate _Q66():
May 21 09:47:13 Call NEVT():
May 21 09:47:13 Call ECG1():
May 21 09:47:13 Call ECRW():
May 21 09:47:13 Call ECR2():
May 21 09:47:13 Call ECR1():
May 21 09:47:13 Call ECGD():
May 21 09:47:13 Call ECRW():
May 21 09:47:13 Call ECR2():
May 21 09:47:13 Call ECR1():
May 21 09:47:13 Call EV4_():
May 21 09:47:13 Call WMNF():
May 21 09:47:13 Call SWEV():
May 21 09:47:13 Call SMIE():
May 21 09:47:13 Call GENS():
May 21 09:47:13 Call SMBI():
May 21 09:47:13 Call SNVC():
May 21 09:47:13 Evaluate _WED():

這是我在 NB 上面按下亮度的 hotkey,大概可以看到一開始 Q event 被發動,接著就很長很長一段不想看的... 我就說痛苦的除錯吧


覆蓋 DSDT


在經過一翻波折好不容易用找到 DSDT 的問題所在,接著便會想把解法在不修改 BIOS 情況下覆蓋上去,目前小弟得知有 2 種以上方法。一是改用 kernel 編譯參數,小弟很懶沒試,有興趣可參考 Debian Wiki,第二種比較推薦,因為只需加 grub 參數即可,但前提是 grub2 才有支援 (Ubuntu 在很早以前就是 grub2 了)。

假設你已經由 iasl 拿到 dsdt.dsl 了,並且在 dsdt.dsl 加入自己想要改的東西,再用 iasl 組譯 dsdt.dsl 成 dsdt.aml,接在把它複製到 /boot/ 下:

$ # make some modification you need
$ iasl -tc dsdt.dsl
$ # it may have warning and error, debug it by yourself
$ sudo cp dsdt.aml /boot/

最後修改 /boot/grub/grub.cfg 裡的 linux 開機參數,找到

linux   /boot/vmlinuz-3.5.0-22-generic root=UUID=026d718b-cb17-41af-a0b3-cb5fa97db936 ro   quiet splash 
initrd  /boot/initrd.img-3.5.0-22-generic

結尾加上 acpi /boot/dsdt.aml

linux   /boot/vmlinuz-3.5.0-22-generic root=UUID=026d718b-cb17-41af-a0b3-cb5fa97db936 ro   quiet splash
initrd  /boot/initrd.img-3.5.0-22-generic
acpi /boot/dsdt.aml

重開機後,再 dump 一次 dsdt 就會發現剛才加的 code 已經被塞進去了。


References


  1. Using systemtap to do runtime aml, http://smackerelofopinion.blogspot.tw/2011/06/using-systemtap-to-do-runtime-aml.html
  2. SystemTap print statements from "embedded C" functions, http://smackerelofopinion.blogspot.tw/2011/09/systemtap-print-statements-from.html

終於寫完了,我的 bug 還在痛苦的除錯中...

Update 2013/8/10


systemtap 2.2.1 for 12.04 已經 backport 到我的 PPA 裡 ppa:fcwu-tw/ppa

2013/05/02

Debug Linux Kernel Module: hid-multitouch


最近在看 Linux Kernel module: hid-multitouch 的問題,在這裡將相關用到的 debug 技巧紀錄下來。

(內容會有點零亂不全,畢竟相關資料小弟沒看幾天)


USB 裝置連線問題


舉凡 USB 插上後沒預期反應可先確認裝置是否有被 USB Hub 偵測到,可用 lsusb 或 dmesg 查看 log。如下
$ dmesg | tail
[ 1589.450251] usb 2-1.2: new full-speed USB device number 5 using ehci_hcd
[ 1589.547043] input: Logitech USB Receiver as /devices/pci0000:00/0000:00:1d.0/usb2/2-1/2-1.2/2-1.2:1.0/input/input14
[ 1589.547234] generic-usb 0003:046D:C52E.0009: input,hidraw1: USB HID v1.11 Keyboard [Logitech USB Receiver] on usb-0000:00:1d.0-1.2/input0
[ 1589.549531] input: Logitech USB Receiver as /devices/pci0000:00/0000:00:1d.0/usb2/2-1/2-1.2/2-1.2:1.1/input/input15
[ 1589.549852] generic-usb 0003:046D:C52E.000A: input,hiddev0,hidraw2: USB HID v1.11 Mouse [Logitech USB Receiver] on usb-0000:00:1d.0-1.2/input1

看起來有被偵測到。再用 lsusb 看一下 USB 列表,有時會再下 -vv 看一些 USB 的參數,像 USB 3.0 or 2.1(參數 bcdUSB)。
$ lsusb
Bus 001 Device 001: ID 1d6b:0002 Linux Foundation 2.0 root hub
Bus 002 Device 001: ID 1d6b:0002 Linux Foundation 2.0 root hub
Bus 001 Device 002: ID 8087:0024 Intel Corp. Integrated Rate Matching Hub
Bus 002 Device 002: ID 8087:0024 Intel Corp. Integrated Rate Matching Hub
Bus 001 Device 003: ID 0a5c:21d7 Broadcom Corp.
Bus 001 Device 006: ID 2149:2003
Bus 001 Device 005: ID 0c45:649c Microdia
Bus 002 Device 005: ID 046d:c52e Logitech, Inc.


USB 封包監聽


如果很不幸的,問題是發生在 driver/kernel 或更底層的問題,以及大大們有能力弄懂 USB protocol 的話,可以用 wireshark and usbmon 來監聽 USB traffic。安裝/打開 wireshark 之前,要先做一些前置動作

$ # 掛 usbmon
$ sudo modprobe usbmomn
$ # 掛 debugfs, 如果已掛上了就不用做
$ mount -t debugfs / /sys/kernel/debug

接著打開 wireshark,就會看到多了幾個可監聽的 USB hubs 可以選,如第一張圖。


driver 沒上(熱插拔)


請先自己想辦法找到對應的 driver,再手動 insmod 即可。要找的方法很多,而且因裝置而異,我這裡就不提了。

通常最常遇到的只是 driver 內沒包含裝置的 vendor and product ID,可以先用 sysfs 內的 new_id 來先做測試,如下
$ # 先把 driver 掛上
$ sudo modprobe hid-multitouch
$ # 接著用 lsusb 確認 vendor and product id
Bus 001 Device 001: ID 1d6b:0002 Linux Foundation 2.0 root hub
Bus 002 Device 001: ID 1d6b:0002 Linux Foundation 2.0 root hub
Bus 001 Device 002: ID 8087:0024 Intel Corp. Integrated Rate Matching Hub
Bus 002 Device 002: ID 8087:0024 Intel Corp. Integrated Rate Matching Hub
Bus 001 Device 003: ID 0a5c:21d7 Broadcom Corp.
Bus 001 Device 006: ID 2149:2003
Bus 001 Device 005: ID 0c45:649c Microdia
Bus 002 Device 005: ID 046d:c52e Logitech, Inc.
$ # 看到了觸控裝置 2149:2003
$ echo 2149 2003 > /sys/module/hid_multitouch/drivers/hid\:hid-multitouch/new_id

到這裡這隻 driver 應該就起作用了。緊接著,若想以後能自動插入 driver 可修改 udev 的 rules,如下:
$ cat /etc/udev/rules.d/41-hid-multitouch.rules
SUBSYSTEM=="usb", ATTRS{idVendor}=="2149", ATTRS{idProduct}=="2003", RUN+="/bin/sh /etc/udev/load_hid_multitouch.sh $env{ID_VENDOR_ID} $env{ID_MODEL_ID}"


input event 監聽


若是 driver 掛上了,行為有點不如預期,可能是有些 input event 會自動消失或是不準的,可以用 evtest 來監看所有的 input event。

$ sudo evtest /dev/input/event11
Input driver version is 1.0.1
Input device ID: bus 0x3 vendor 0x2149 product 0x2003 version 0x110
Input device name: "Advanced Silicon S.A. CoolTouch(TM) System"
Supported events:
  Event type 0 (EV_SYN)
  Event type 1 (EV_KEY)
    Event code 330 (BTN_TOUCH)
  Event type 3 (EV_ABS)
    Event code 0 (ABS_X)
      Value   9104
      Min        0
      Max    32767
    Event code 1 (ABS_Y)
      Value  18364
      Min        0
      Max    32767
    Event code 47 (ABS_MT_SLOT)
      Value      0
      Min        0
      Max        9
    Event code 53 (ABS_MT_POSITION_X)
      Value      0
      Min        0
      Max    32767
    Event code 54 (ABS_MT_POSITION_Y)
      Value      0
      Min        0
      Max    32767
    Event code 57 (ABS_MT_TRACKING_ID)
      Value      0
      Min        0
      Max    65535
Testing ... (interrupt to exit)
Event: time 1367477844.348301, type 3 (EV_ABS), code 57 (ABS_MT_TRACKING_ID), value 50
Event: time 1367477844.348303, type 3 (EV_ABS), code 53 (ABS_MT_POSITION_X), value 9655
Event: time 1367477844.348303, type 3 (EV_ABS), code 54 (ABS_MT_POSITION_Y), value 10190
Event: time 1367477844.348313, type 1 (EV_KEY), code 330 (BTN_TOUCH), value 1
Event: time 1367477844.348315, type 3 (EV_ABS), code 0 (ABS_X), value 9655
Event: time 1367477844.348315, type 3 (EV_ABS), code 1 (ABS_Y), value 10190
Event: time 1367477844.348316, -------------- SYN_REPORT ------------
Event: time 1367477844.493292, type 3 (EV_ABS), code 57 (ABS_MT_TRACKING_ID), value -1
Event: time 1367477844.493301, type 1 (EV_KEY), code 330 (BTN_TOUCH), value 0
Event: time 1367477844.493302, -------------- SYN_REPORT ------------

最後的問題有可能是出現在 driver or application,這就看自己的造化了。小弟我遇到的問題是都有,還好 upstream 都解了。最後提一下,在看 driver 前除了有基本的知識外,舉例來說在解 USB HID multitouch driver 時,最好可以從 USB protocol 到 hid-multitouch 都有基本的了解,USB protocol 網上資料一堆,hid-multitouch 則看 kernel 裡的 Documentation/input/multi-touch-protocol.txt 即可。

(唉,解 bug 花的時間沒寫文章的多)

Reference

2013/04/30

在 Ubuntu Unity 內加入自訂程式及捷徑

小弟的 NB 時常家裡公司搬來搬去,環境不同有些程式或設定都要重開(設),很麻煩。除了用一個簡單的 script 的方式去設定這些東西,另外我們可以藉由 Unity 來提供更視覺化的界面。

在 Launcher(啟動器) 內加入指令


這個例子(如上圖),是在 Launcher 裡加一個 lock screen 的程式。簡單的說就是寫一個 .desktop,把指令寫在 exec 那行,再把它放在家目錄的 ~/.local/share/applications/ 即可。

$ cat .local/share/applications/lock.desktop
[Desktop Entry]
Name=lock screen
Icon=/usr/share/icons/oxygen/128x128/actions/system-lock-screen.png
Exec=gnome-screensaver-command --lock
Terminal=true
Type=Application
Categories=Settings;DesktopSettings;
StartupNotify=true

加入捷徑並增加右鍵選單


在 Unity 的左邊有一排捷徑,可以用 gsettings get 取得列表,如下:

$ gsettings get com.canonical.Unity.Launcher favorites
['application:///home/dorowu/bin/custom-config.desktop', 'application://firefox.desktop', 'application://terminator.desktop', 'application://gvim.desktop', 'application://nautilus.desktop', 'application://zim.desktop', 'application://gemanx.desktop', 'application://virtualbox.desktop', 'application://shutter.desktop', 'application://google-chrome.desktop', 'application://gnome-control-center.desktop', 'unity://expo-icon', 'unity://devices', 'unity://running-apps']

捷徑可以放在任意位置,我是放在家目錄的 bin,接著再開 nautilus 拖進去就行。如上圖。

$ cat bin/custom-config.desktop
[Desktop Entry]
Encoding=UTF-8
Name=SwitchSetting
Exec=/home/dorowu/bin/config.sh
Icon=/usr/share/icons/Humanity/apps/48/redhat-tools.svg
Terminal=true
Type=Application
StartupNotify=false
X-Ayatana-Desktop-Shortcuts=Test1;Test2;Test3


[Test1 Shortcut Group]
Name=General
Exec=/home/dorowu/bin/config.sh
TargetEnvironment=Unity

[Test2 Shortcut Group]
Name=General_Unity
Exec=/home/dorowu/bin/config.sh 1
TargetEnvironment=Unity

[Test3 Shortcut Group]
Name=Asustor
Exec=/home/dorowu/bin/config.sh 1 asustor
TargetEnvironment=Unity

Reference

2013/04/23

Install Ubuntu Core on NAS


好久之前入手了一台華芸科技 ASUSTOR AS-604T 的 NAS,對於某些玩家來說(像我),不能方便的用 apt 安裝自己想要的軟體實在是很麻煩,還好的是用 Ubuntu Core 來在上面製作一個簡單的 Ubuntu rootfs 是非常容易的。本文最後將在 Ubuntu Core 上安裝另一個 SSH server 做為介紹。

考量到為了以後方便移植軟體進去 NAS,推薦使用跟 AS-604T 相容的 Ubuntu 版本 (11.10) 未來才不會遇到太多函式庫相依的問題。

接著本文將展示
  • 使用 Ubuntu Core
  • Hacking ASUSTOR NAS

安裝 Ubuntu Core

$ ssh root@192.168.0.50 # ssh to your NAS
$ # Download Ubuntu Core 11.10
$ cd /volume1/ 
$ wget http://cdimage.ubuntu.com/ubuntu-core/releases/11.10/release/ubuntu-core-11.10-core-amd64.tar.gz
$ # Extract it to ubuntu
$ mkdir ubuntu && tar xvf ubuntu-core-11.10-core-amd64.tar.gz -C ubuntu/

mount.sh

$ cat << END > mount.sh
#!/bin/sh
ubuntu=/volume1/ubuntu
if [ "\$1" == "umount" ]; then
    if grep -q " \$ubuntu/" /proc/mounts; then
        awk -v ubuntu=$ubuntu '$2 ~ /ubuntu\// { print \$2 }' /proc/mounts | sort -u | xargs umount
    else
     true
    fi
elif [ "\$1" == "mount" ]; then
    grep -q " \$ubuntu/proc " /proc/mounts || mount -o bind /proc \$ubuntu/proc
    grep -q " \$ubuntu/sys " /proc/mounts || mount -o bind /sys \$ubuntu/sys
    grep -q " \$ubuntu/mnt" /proc/mounts || mount -o bind /volume1 \$ubuntu/mnt
    grep -q " \$ubuntu/dev/pts" /proc/mounts || mount -t devpts /dev/pts \$ubuntu/dev/pts
else
    awk -v ubuntu=\$ubuntu '\$2 ~ /ubuntu\// { print \$2 }' /proc/mounts | sort -u
fi
END
$ chmod +x mount.sh

chroot.sh

$ cat << END > chroot.sh
#!/bin/sh
if [ \$# == "0" ] ; then
    chroot /volume1/ubuntu /bin/bash
else
    chroot /volume1/ubuntu \$*
fi
END
$ chmod +x chroot.sh

安裝基本工具 and 切換到 Ubuntu

$ echo nameserver 8.8.8.8 >> /etc/resolv.conf
$ cat << END >> /etc/apt/source.list
deb http://tw.archive.ubuntu.com/ubuntu/ precise universe
deb-src http://tw.archive.ubuntu.com/ubuntu/ precise universe
deb http://tw.archive.ubuntu.com/ubuntu/ precise-updates universe
deb-src http://tw.archive.ubuntu.com/ubuntu/ precise-updates universe
END
$ ./mount.sh mount # 掛載 filesystems,每次開機只要做一次
$ ./chroot.sh #切換到 Ubuntu
$ apt-get update
$ apt-get install command-not-found less vim x11-apps
至此我們已經有一個 Ubuntu 可以使用了。

安裝另一個 OpenSSH server

$ apt-get install openssh-server
$ passwd root
$ sed -i 's/^Port 22$/Port 2222/' /etc/ssh/sshd_config
$ /etc/init.d/ssh start
從別台電腦登入新開的 ssh server,順便啟用 X11 Forwarding
$ xhost +
$ ssh -X root@192.168.0.50 -p 2222
$ # 設 local ip:display number
$ export DISPLAY=192.168.0.100:0
$ xclock
結果如同第一張圖所示,我們新開了一個 ssh service 在 2222 埠,連進去後 X11 Forwarding 也能順利使用(原先 ASUSTOR NAS 的 ssh server 不提供 X11 forwarding)。

順便提供自動設 DISPLAY 參數的 script,可以加在 ~/.bashrc,以後就不用每次 export DISPLAY=...
# DISPLAY
remote_ip=`env | awk '$0 ~ /^SSH_CLIENT=/ {print substr($1, index($1, "=") + 1)}'`
if [ ! -z "$remote_ip" ] ; then
    export DISPLAY=$remote_ip:0
    echo DISPLAY=$DISPLAY
fi

ASUSTOR NAS 程式自動啟動


可以在 /usr/local/AppCentral/*/CONTROL/start-stop.sh 找到一些 ASUSTOR NAS 的啟動 script。我隨便挑了一個 python 的 start-stop.sh 來偷加入剛才的 ssh server 啟動結束指令,如下列第 11 及 17 行

1 #!/bin/sh
     2
     3 EASY_INSTALL_BIN=/usr/local/AppCentral/python/bin/easy_install
     4 EASY_INSTALL_LINK=/usr/local/bin/easy_install
     5
     6 case $1 in
     7
     8  start)
     9   echo "Starting python..."
    10   ln -sf $EASY_INSTALL_BIN $EASY_INSTALL_LINK
    11   /volume1/mount.sh mount && /volume1/chroot.sh /etc/init.d/ssh start
    12   ;;
    13
    14  stop)
    15   echo "Stopping python..."
    16   rm -rf $EASY_INSTALL_LINK
    17   /volume1/chroot.sh /etc/init.d/ssh stop && /volume1/mount.sh umount
    18   ;;
    19
    20  *)
    21   echo "usage: $0 {start|stop}"
    22   exit 1
    23   ;;
    24
    25 esac
    26 exit 0

(為什麼 NAS 系統不直接以 Ubuntu/Debian/... 當做 base system 就好)

2013/04/18

gksudo & pkexec (PolicyKit)


gksudo 和 pkexec 是二種有圖形化介面取得 root 權限執行程式的方式。gksudo 是 sudo 的 GTK+ frontent,也因此它與 sudo 是用相同的權限管理設定。

pkexec 是基於 PolicyKit,比起 sudo(gksudo),它提供更彈性權限管理與介面客製化的設定。在 Ubuntu 12.04 上可以在以下地方找到它的設定檔:
  • Actions: /usr/share/polkit-1
  • Local Authorities: /etc/polkit-1
  • 3rd party Authorities: /var/lib/polkit-1
Actions 是設定行為,舉例來說 gparted 的執行權限如下:
$ cat /usr/share/polkit-1/actions/com.ubuntu.pkexec.gparted.policy
<?xml version="1.0" encoding="UTF-8"?>
<!DOCTYPE policyconfig PUBLIC
 "-//freedesktop//DTD PolicyKit Policy Configuration 1.0//EN"
 "http://www.freedesktop.org/standards/PolicyKit/1/policyconfig.dtd">
<policyconfig>

  <action id="com.ubuntu.pkexec.gparted">
    <message gettext-domain="gparted">Authentication is required to run the GParted Partition Editor</message>
    <icon_name>gparted</icon_name>
    <defaults>
      <allow_any>auth_admin</allow_any>
      <allow_inactive>auth_admin</allow_inactive>
      <allow_active>auth_admin</allow_active>
    </defaults>
    <annotate key="org.freedesktop.policykit.exec.path">/usr/sbin/gparted</annotate>
    <annotate key="org.freedesktop.policykit.exec.allow_gui">true</annotate>
  </action>

</policyconfig>

allow_* 則可根據不同的使用情境設定授權方式,像 auth_admin 就是要求授權對象(user)需有管理權限才能執行,換句話說就是要輸入密碼。詳細不同點可參考下方引用
allow_any, allow_inactive, and allow_active. Inactive sessions are generally remote sessions (SSH, VNC, etc.) whereas active sessions are logged directly into the machine on a TTY or an X display. Allow_any is the setting encompassing both scenarios.
For each of these settings the following options are available:
  • no: The user is not authorized to carry out the action. There is therefore no need for authentification.
  • yes: The user is authorized to carry out the action without any authentification.
  • auth_self: Authentication is required but the user need not be an administrative user.
  • auth_admin: Authentication as an administrative user is require.
  • auth_self_keep: The same as auth_self but, like sudo, the authorization lasts a few minutes.
  • auth_admin_keep: The same as auth_admin but, like sudo, the authorization lasts a few minutes.
 annotate key 的那 2 行則是設定程式路徑及是否允許 GUI。

什麼叫做管理權限呢?在 /etc/polkit-1/localauthority.conf.d/51-ubuntu-admin.conf 設定了若該位使用者為 sudo 或 admin group 便能算是有管理權限
$ cat /etc/polkit-1/localauthority.conf.d/51-ubuntu-admin.conf
[Configuration]
AdminIdentities=unix-group:sudo;unix-group:admin
當然你也可以根據不同 action 設定不同的管理權限及反應。像是在 /var/lib/polkit-1/localauthority/10-vendor.d/com.ubuntu.desktop.pkla 裡有一段
[Disable hibernate by default]
Identity=unix-user:*
Action=org.freedesktop.upower.hibernate
ResultActive=no
裡頭設定了所有使用者(unix-user:*)都不行(ResultActive)用 org.freedesktop.upower.hibernate。

參考資料

2013/03/20

使用 py2exe 製作 wxPython 執行檔

製作 wxPython 執行檔的方法很多,像 pyinstaller, cx-freeze, shedlin,網路上有人做了個比較表可以參考。本篇主要給了一個 py2exe 的例子。

所有的程式放在 github

環境
  • Windows XP
  • Visual Studio 2008 Express
  • Python 2.7
  • wxPython 2.8
  • py2exe 0.6.8.win32-py2.7
Hello World in wxPython

首先,先準備好要編成執行檔的 wxPython 源碼,存成 main.py

import wx

class MainWindow(wx.Frame):
    def __init__(self, parent, title):
        wx.Frame.__init__(self, parent, title=title, size=(200,100))
        self.control = wx.TextCtrl(self, style=wx.TE_MULTILINE)
        self.CreateStatusBar() # A Statusbar in the bottom of the window

        # Setting up the menu.
        filemenu= wx.Menu()

        # wx.ID_ABOUT and wx.ID_EXIT are standard IDs provided by wxWidgets.
        filemenu.Append(wx.ID_ABOUT, "&About"," Information about this program")
        filemenu.AppendSeparator()
        filemenu.Append(wx.ID_EXIT,"E&xit"," Terminate the program")

        # Creating the menubar.
        menuBar = wx.MenuBar()
        menuBar.Append(filemenu,"&File") # Adding the "filemenu" to the MenuBar
        self.SetMenuBar(menuBar) # Adding the MenuBar to the Frame content.
        self.Show(True)

app = wx.App(False)
frame = MainWindow(None, "Sample editor")
app.MainLoop()

py2exe setup.py

複製 Visual studio libraries 到 python DLLs 資料匣
copy C:\Program Files\Microsoft Visual Studio 9.0\VC\redist\x86\Microsoft.VC90.CRT\*.dll C:\Python27\DLLs
準備 py2exe 佈署設定程式 setup.py 如下

#!/usr/bin/python

from distutils.core import setup
import py2exe
from glob import glob
import sys

#sys.path.append('ftpserver')

manifest = """
<?xml version="1.0" encoding="UTF-8" standalone="yes"?>
<assembly xmlns="urn:schemas-microsoft-com:asm.v1"
manifestVersion="1.0">
<assemblyIdentity
    version="0.64.1.0"
    processorArchitecture="x86"
    name="Controls"
    type="win32"
/>
<description>Your Application</description>
<dependency>
    <dependentAssembly>
        <assemblyIdentity
            type="win32"
            name="Microsoft.Windows.Common-Controls"
            version="6.0.0.0"
            processorArchitecture="X86"
            publicKeyToken="6595b64144ccf1df"
            language="*"
        />
    </dependentAssembly>
</dependency>
</assembly>
"""

"""
installs manifest and icon into the .exe
but icon is still needed as we open it
for the window icon (not just the .exe)
changelog and logo are included in dist
      data_files=["yourapplication.ico"]
            "other_resources": [(24,1,manifest)]
    data_files=data_files,
"""
data_files = [("Microsoft.VC90.CRT", glob(r'C:\Program Files\Microsoft Visual Studio 9.0\VC\redist\x86\Microsoft.VC90.CRT\*.*'))]
includes = []
excludes = ['_gtkagg', '_tkagg', 'bsddb', 'curses', 'email', 'pywin.debugger',
            'pywin.debugger.dbgcon', 'pywin.dialogs', 'tcl',
            'Tkconstants', 'Tkinter']
packages = []
dll_excludes = ['libgdk-win32-2.0-0.dll', 'libgobject-2.0-0.dll', 'tcl84.dll',
                'tk84.dll']

setup(
    windows = [
        {
            "script": "main.py",
        }
    ],
    options = {"py2exe": {"compressed": 2,
                          "optimize": 2,
                          "includes": includes,
                          "excludes": excludes,
                          "packages": packages,
                          "dll_excludes": dll_excludes,
                          "bundle_files": 3,
                          "dist_dir": "dist",
                          "xref": False,
                          "skip_archive": False,
                          "ascii": False,
                          "custom_boot_script": '',
                         }
              },
) 

打開命令提示字元下

cd \path\to\hello
python setup.py py2exe

在資料匣 dist 便可發現執行檔

2013/03/18

近況


記錄一下近況


這陣子結束了 1 年多在 NAS 產業的工作,該公司剛成立我便進去了,離開的原因有很多,除了我認為公司要上市的時間會比我想像的很還久,另外也是 C 社的魅力,以及我希望能做一些開源的專案。

A 公司

在 A 公司的那段時間,我主要的工作是把 Boxee 放在 NAS 上執行。為了達到最佳的使用者經驗,做了不少貢獻,
  1. a window manager which is based on evilwm/xcompmgr
  2. a media player which is based on mplayer
  3. SGX 545 OpenGL and VAAPI porting
  4. a server, written in Python, to broadcast Avahi packet and communicate with Remote Controller and Boxee
  5. a Android App to control Boxee remotely. 
除了 Boxee 外,另一個專案關於串流的部分還沒來得及看到成果便離開。

 C 社

在加入 C 社前思考了很多,最大的動力是想說來到這裡可以有更多的時間從事自己有興趣的專案,也希望在這幾個月內,能夠多寫一些東西或將目前在做的電視串流的專案能夠開源。